first of all let me just say, your builds are the most clean and neat that I have ever seen..... now how and why do put them together before covering?
I know you probably disassemble before covering , how do you hold them together ??
great job!!!!!!
Ronnie
Guillows Bird Dog Build
34 posts
• Page 2 of 3 • 1, 2, 3
ADW, It is real hard to hide flaws by covering and painting, unless it is a display model and you can add filler and primer. Also I put glue on the former before placing it on the keel. I use Testors wood cement to glue the plane together for the photos, then dissemble with Nail Polish remover.
- scigs30
- Posts: 844
- Joined: Mon Nov 06, 2006 11:31 am
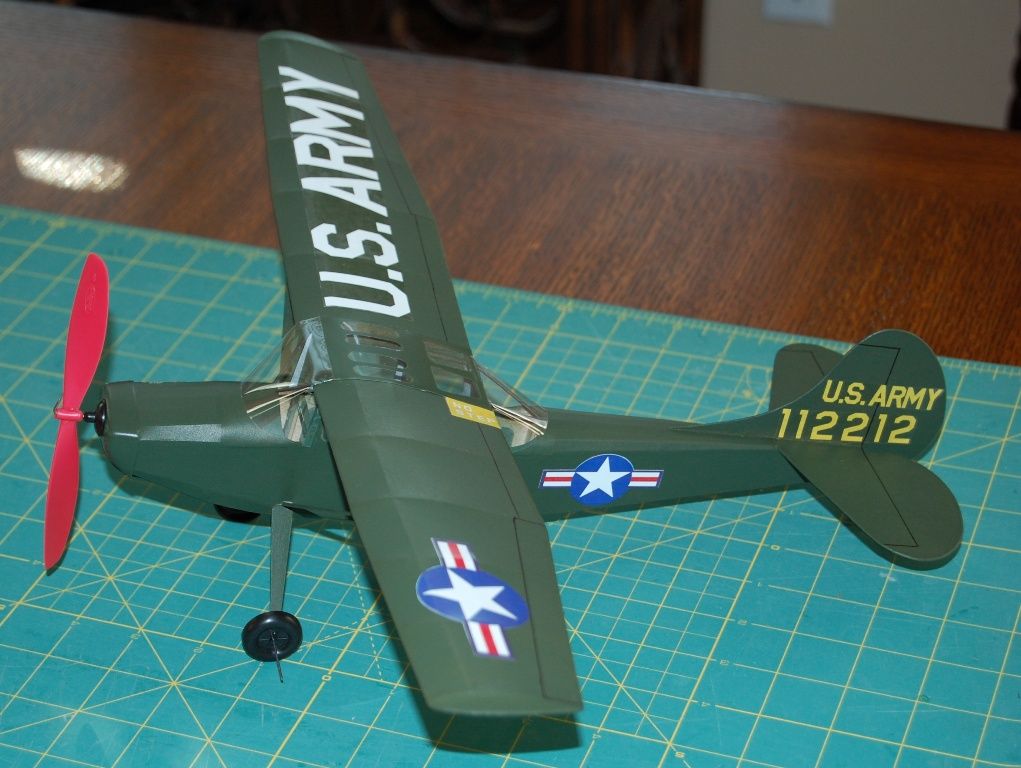
Everything is covered and I am going to try this floral paint. I am not a big fan of painting models with spray paint because of the weight. I have heard great things about this paint so I am trying it on this bird. I sprayed it on some card board and it goes on light and smells like the old Pactra spray dope. That stuff was great, went on smooth and did not add much weight. I am hoping the same for this stuff. This build is straight from the box and covered with Guillows tissue. I applied the tissue with 50/50 water Elmers glue mix. I made a cardinal error at this point. Guillows only supplied a half sheet of tissue with this kit. I thought the long direction was the grain and covered most of the model with the grain running in the direction I wanted it to. I then noticed the grain was going in the wrong direction on most of my structures. So this is how easy it is to remove tissue when using the 50/50 water glue mixture. I brush on copious amounts of water to where the tissue is glued on. I let is sit a few minutes then brush on more water. After 3 to five minutes the tissue falls right off the structure, that easy. I then sand smooth and recover. I used alcohol on the tissue to shrink it, then brushed on 2 coats of 50/50 dope. I knew there was going to be some problems with stress wrinkles, but did not address them. I figured that this is an experimental build because of the spray paint so it is no big deal. But there are a couple of learning points I can pass on. 1. Domestic tissue shrinks a lot less then Esaki, but still shrinks enough to cause stress wrinkles. The best way to avoid this is to brace the weak area with gussets or extra longerons. You can see I got my stress wrinkles at the root ribs and along the nose of the fuselage where the tissue pulled in the balsa sheeting. The pin holes on the cowling is where I was going to cut out the tissue. I poke the tissue with pin holes, then brush on glue to adhere the tissue to the piece of balsa. Then I would cut out the tissue and add a new piece. But I got lazy and said oh well and just left it. Once again, the only way to prevent stress wrinkles is to identify the areas where the tissue is going to attach and pull the structures. Once you identify them, reinforce that area, problem solved. Now most of the time this is not an issue with Guillows kits, but this is a light design with light wood. If I used Esaki, the problem would have been twice as bad since Esaki shrinks so much. I am going to use Peck wheels so I don't have to deal with painting the wood wheels. The paper wing cover is just sitting there, still have to paint and glue on.


- scigs30
- Posts: 844
- Joined: Mon Nov 06, 2006 11:31 am
The new paint went on great, I used multiple light coats with no problems. Did not add much weight and covers well. Weight as shown is 17 grams. I still have not decided on the wheels, that is why the wire is not bent up. I used a couple of decals to cover the 2 wrinkles I had, I know a tad tacky but that's how it goes. The window patterns were great and I glued the windows on with canopy glue. I would definitely use this paint again.




- scigs30
- Posts: 844
- Joined: Mon Nov 06, 2006 11:31 am
I found these old pictures of how I used to build Guillows kits. I replaced the wood with quality wood and basically redesigned the kits. I just don't have the time or patience to do this any more, that is why I build straight from the box. One is the Aeronca and the other is the Hellcat.
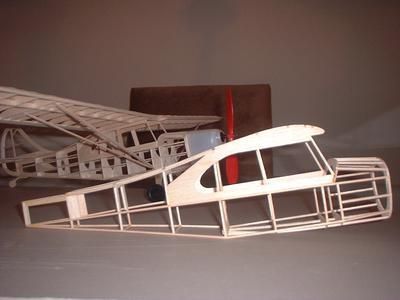
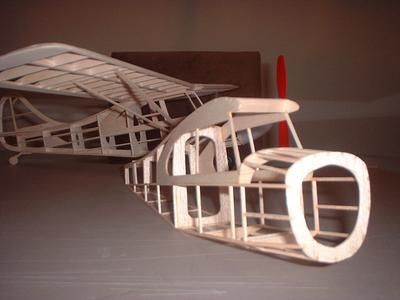
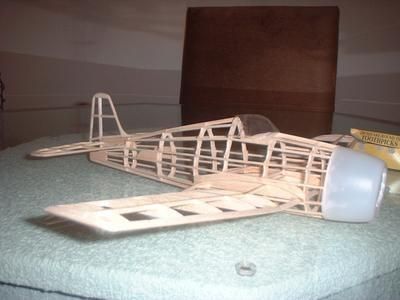
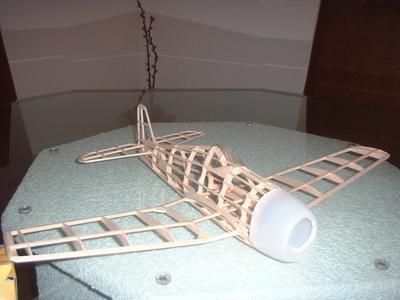


- scigs30
- Posts: 844
- Joined: Mon Nov 06, 2006 11:31 am
Re:
[quote="scigs30"]The new paint went on great, I used multiple light coats with no problems. Did not add much weight and covers well. Weight as shown is 17 grams.
This reply comes kind of long after your build, but when I saw your build, I was fascinated. Your experience with that rattlecan floral paint is a real eye-opener.
The model is a masterpiece.
This reply comes kind of long after your build, but when I saw your build, I was fascinated. Your experience with that rattlecan floral paint is a real eye-opener.
The model is a masterpiece.
- DenisCullinan
- Posts: 29
- Joined: Sat Oct 01, 2011 5:00 pm
- Location: Queens, NYC
Re: Guillows Bird Dog Build
Thats a beautiful model. definitely Model of the Month material.
- davidchoate
- Posts: 1263
- Joined: Wed Aug 14, 2013 6:41 am
- Location: PHiladelphia PA
Re: Guillows Bird Dog Build
Greetings Scigs30.
Your Bird Dog is absolutely beautiful

 Your photos tell a wonderful story.
I currently have this kit, and have started to "punch" the parts out of the sheets to begin the build.
My plan is to build mine as a 3 channel ( motor, rudder, elevator ) RC, using electronics & stuff from the HobbyZone Champ airplane. Should be fun. I'm thinking she'll fly like a Champ.
Your Bird Dog is absolutely beautiful
I currently have this kit, and have started to "punch" the parts out of the sheets to begin the build.
My plan is to build mine as a 3 channel ( motor, rudder, elevator ) RC, using electronics & stuff from the HobbyZone Champ airplane.
- SpiceMan
- Posts: 110
- Joined: Wed Jul 31, 2013 8:52 am
- Location: Phoenix, AZ
Re: Guillows Bird Dog Build
Spiceman, I learned to fly on a Champ. It weighs 38g. I also have the Birddog kit. I will probably make it a 3 ch rc, but know it will be over 38g. There is a co. called Firelands / Ares. They have a plane called Taylorcraft. It has an upgrade kit for like $40 that includes a ESC, brushless motor, and aileron servo. I have done several converts, ans this little brushless is the way to go. You can use it with the servu Rx brick too. no need for a changing of receiver.
You do not have the required permissions to view the files attached to this post.
- davidchoate
- Posts: 1263
- Joined: Wed Aug 14, 2013 6:41 am
- Location: PHiladelphia PA
Re: Guillows Bird Dog Build
Yor Bird dog was 17G's with kit wood, and no modifications? Why am I having so many weight issues. I build a 500 me109 and it still weighs 50g,s, and if it didnt, It would after I added the needed balance weight. What am I doing wrong? the RC gear wiyh motor and batt is 20g's. I am doing something wrong here. I use Ca glu sparingly, Have tried colored tissue to save paint weight. left off decals. WHY? I'm trying the cutting out yhe center of ribs, scalloping, and all the tricks. I have the Birddog kit, and am going to see what happens. Oh, and Mitch, If your reading, My 400 mustang FF weighs 120 g's give or take. Is that acceptable. I know now that the 400's if FF built can eliminate ribs, and oyher things without losing integrity. I have 10 kits in stock. The 400's im doing RC, bit the others Im going to build FF, and please help me along the way. I'm starting on the Birddog this week.
You do not have the required permissions to view the files attached to this post.
- davidchoate
- Posts: 1263
- Joined: Wed Aug 14, 2013 6:41 am
- Location: PHiladelphia PA
Re: Guillows Bird Dog Build
thats just beautiful work. NOw I have another question. I dont mind applying wet, or dry. But it would seem logical that if applied wet, and wrinkles pulled out. would it shrink considerably more than if applied dry, and then moistened. As I see it slacken when damped. And my problem isnt really wrinkles. I use a elmers glue stick to apply, and if a wrinkle starts, I (as long as the Elmers Is not completely dry) just moistin it a bit, and smooth out the wrinkle. my problem with shrinking is the warping that has plagued me since day !. And sometimes it doesnt even show up for weeks later. Frustrating. I even tried the 100 tiny section method on the plan, alternating sides, and honestly, I liked it. If done with care the seems of tissue appear as panels. Like a scale plane.I've tried every covering, but Esaki. Simply because I havent found it yet.
- davidchoate
- Posts: 1263
- Joined: Wed Aug 14, 2013 6:41 am
- Location: PHiladelphia PA
Re: Guillows Bird Dog Build
I would recommend you try Esaki tissue...it is on sale right now at A to Z corp. Also known as Peck Polymers...they may be sold out as they are closing may 30...Also Easy built models carries it as well as shortys basement...if I could I would Only use Esaki...it is a powerful shrinker...you can play with it before covering a delicate framed model as it can warp a structure..my only other grip is only comes in 9 colors and as it is so light they are a bit see thru...some like this as it shows off structure under it..great for endurance and old timer planes...perhaps less desirable on say a Guillows wwII scale fighter where you are trying to represent painted alum skin..but it can be painted..with airbrush for light weight...a trick I learned from Don Ross book is cover your wing both sides and lightly shrink...you can control shrink by light misting with water or 50/50 mix of water and rubbing alcohol..then pin the wing down very well to building board..do not skip on pins..I put two on every rib..one at leading edge and one at trailing edge..I build on pink foam board and use thecolorful plastic head tacks so not real long spikes...the idea is to hold the structure flat but no hard down pressure to dent nalsa or cut the wet tissue...Esaki has great wet strength...then after satisfied structure is held flat as you can make it, really wet it down well..no puddles but the Esaki will get quite translucent....now let dry at least over night...longer if your not in a hurry...the idea here is we build stress into our balsa structure ..like it or not..some ribs are press fit...some have a tiny gap so we pin them tight and glue...with all that water some soaks in to balsa and then slowly goes away...that slower dry time seems to releave much of the stress...this has worked well for me on the Arrow....I would proceed with caution on a peanut scale.
Last edited by hunterdude on Sat May 17, 2014 10:16 pm, edited 1 time in total.
- hunterdude
- Posts: 49
- Joined: Thu May 08, 2014 10:22 am
34 posts
• Page 2 of 3 • 1, 2, 3
Return to General Building Questions
Who is online
Users browsing this forum: No registered users and 23 guests

