500 Series FW-190 Build

Ask other modelers for a little help / knowledge ?

500 Series FW-190 Build

Postby scigs30 » Tue Mar 04, 2008 9:34 pm

I have started my next 500 series model. The kit wood is ok but I will be making my own decals this time. I will cover with Domestic Dark Brown, Tan and Light Blue. This will be a flying model. I will build as per the plan with some minor mods. I will have to make a nose block, functioning landing gear, larger prop and Peck wheels.
Image
Image
Image
Image
scigs30
 
Posts: 844
Joined: Mon Nov 06, 2006 11:31 am

Postby scigs30 » Tue Mar 04, 2008 9:35 pm

Image
Image
Image
Image
Image
Image
scigs30
 
Posts: 844
Joined: Mon Nov 06, 2006 11:31 am

Postby Xanadu » Tue Mar 04, 2008 9:49 pm

Looking really good, can hardly wait to see this one fly!
Xanadu
 
Posts: 497
Joined: Wed Sep 27, 2006 9:48 pm
Location: Anola, MB, Canada

Postby Scale Nut » Wed Mar 05, 2008 7:42 pm

you make it look so easy !

thanks for posting all of your detailed builds , you have become an invaluable resource for a beginner like me.I've viewed all your builds here several times as I've been learning

Scigs30, If you don't mind ,can you post just a few pics of the tissueing process as you go along ? that would be very helpfull as I'm almost ready to tissue my first model.
Scale Nut
 
Posts: 15
Joined: Sat Feb 23, 2008 2:45 pm

Postby scigs30 » Fri Mar 07, 2008 2:10 am

I am sorry but I did not take any pictures along the way when I was covering. The best advise I can give about covering is practice, practice, practice. When you build a model, finish it. It is easy to build the frame work, set the plane down and start on another plane. I use 50/50 water and Elmers glue. I do not recommend this because it is hard to cover this way, but it is the way I learned so I keep doing it. When I show someone how to cover I have them use glue sticks, much better for the beginner. A problem I notice with covering is trying to cover too big of section at a time. I never apply my covering wet so I have to cover in sections to avoid wrinkles. Hope this helps. When I am done with this build I am going to start on the Hurricane and I will try to post pictures of my covering.
scigs30
 
Posts: 844
Joined: Mon Nov 06, 2006 11:31 am

Postby supercruiser » Fri Mar 07, 2008 9:49 am

Here is a link that I posted on another thread. IT's about repairing a tissue model but, the principles are the same for covering.

http://www.youtube.com/watch?v=erxs74Vi9wI
supercruiser
 
Posts: 405
Joined: Wed Jun 15, 2005 8:47 am

Postby scigs30 » Fri Mar 07, 2008 12:02 pm

Here are some pictures of the beast covered, still have some detail work before she flies.
Image
Image
Image
Image
Image
scigs30
 
Posts: 844
Joined: Mon Nov 06, 2006 11:31 am

Postby scigs30 » Fri Mar 07, 2008 12:21 pm

I watched the video, and it is good to watch. That is how I apply my tissue, 50/50 Elmers and water. Just know that if you are using domestic tissue you only have one shot at applying the tissue. If you try to move it around it will tear. When I apply my tissue I apply it dry and let the tissue lay down smooth on the surface. I then press the tissue into the glued portions of the frame. I do not tug and pull because this will rip the tissue or cause wrinkles. If the tissue does no lay down smooth on my practice run, then I use multiple pieces. The wing is a little more tricky. I first apply the tissue to the root rib only. When that is dry, 3-5 min. I apply the tissue to the last rib next to the tip. When that is dry I apply glue and the tissue to the leading edge and trailing edge. A wing like my FW190 uses 4 pieces of tissue just for the top. One piece on each wing tip and one piece on each panel. Some times I will use 2 or more pieces of tissue just on the wing tip itself. Hope this helps.
scigs30
 
Posts: 844
Joined: Mon Nov 06, 2006 11:31 am

Postby scigs30 » Fri Mar 07, 2008 12:48 pm

Here is a picture of my next Guillow 500 build. I will use Black Esaki for the covering, can't wait.
Image
Image
scigs30
 
Posts: 844
Joined: Mon Nov 06, 2006 11:31 am

Postby kittyfritters » Sat Mar 08, 2008 7:16 pm

Dave,

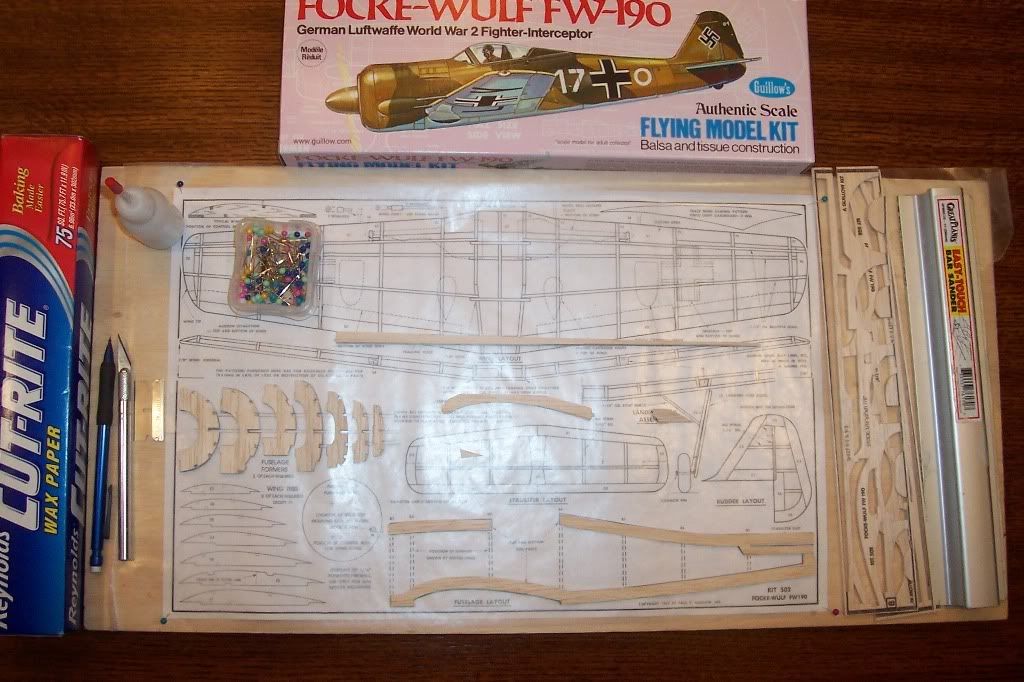
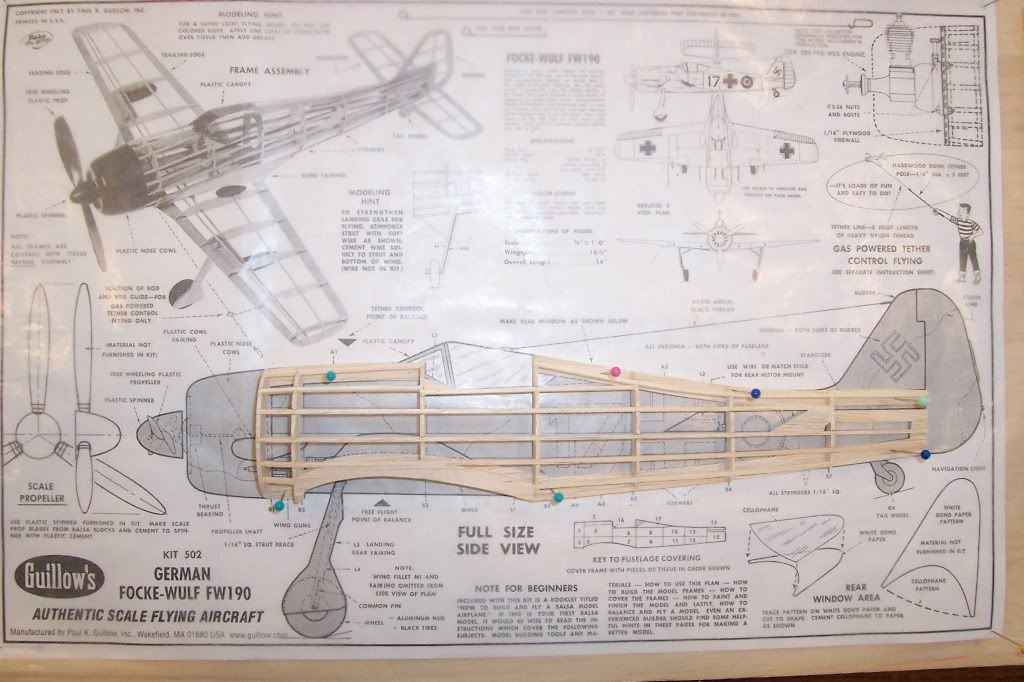
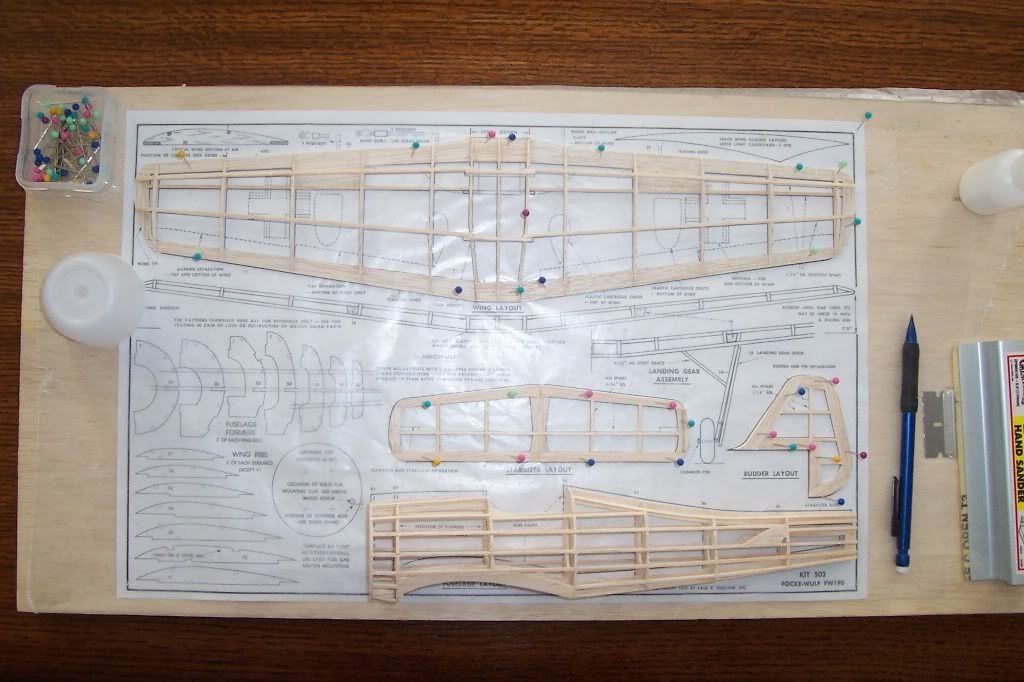
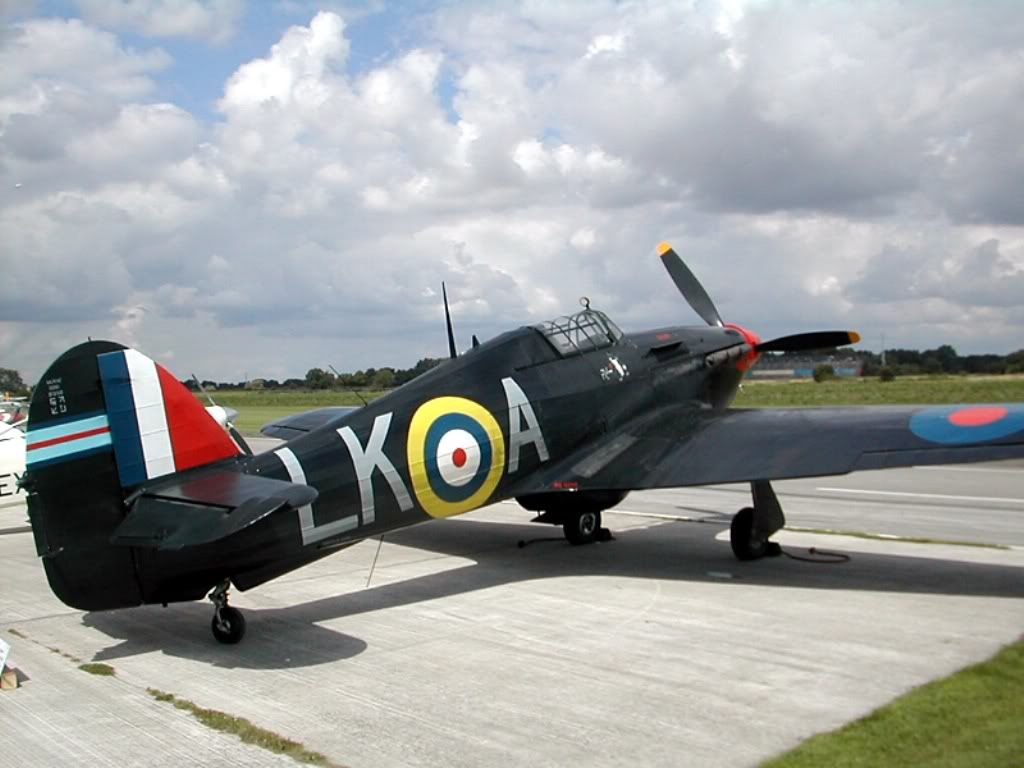
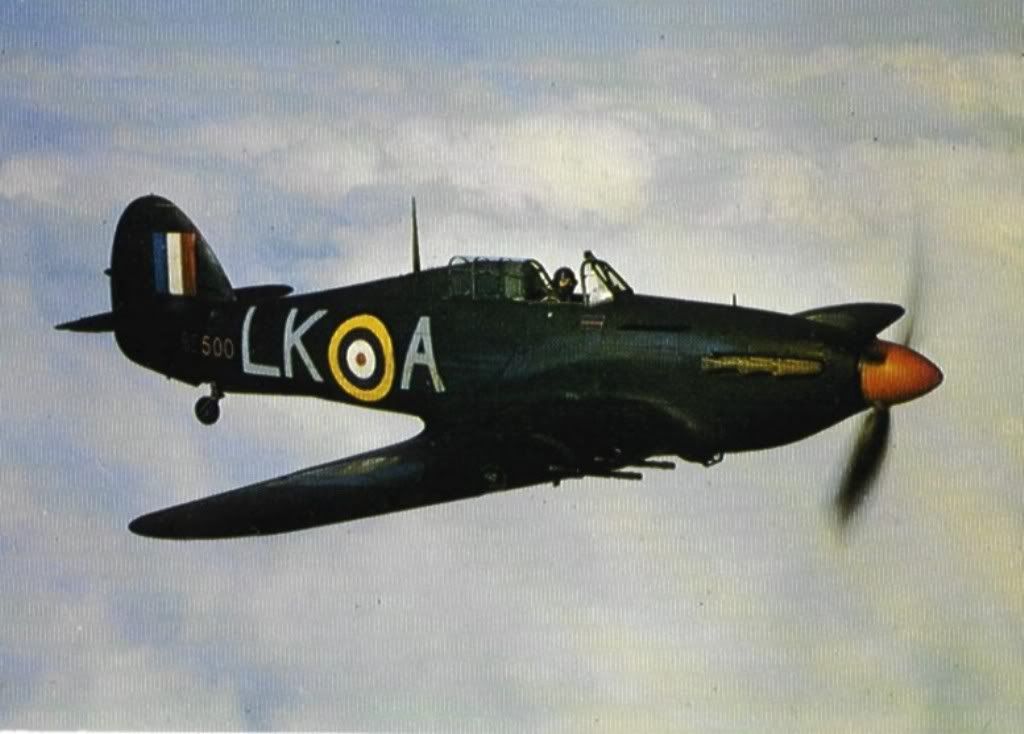
I've never built the 500 series Hurricane kit before, but there have been several good looking ones lately, and when James built one I thought that I might as well, so I stopped by a local hobby shop and bought one. When I got it home I opened the kit, weighed the wood and looked at the plans. Now I understand why everyone who builds one seems to have trouble getting a model with good wing area and an ample tail surface to fly. In proportional terms, this thing has more lumber aft of the C.G. than any other kit I have seen. I'm not sure that even a lifting tail will get this one flying i built according to the plans.

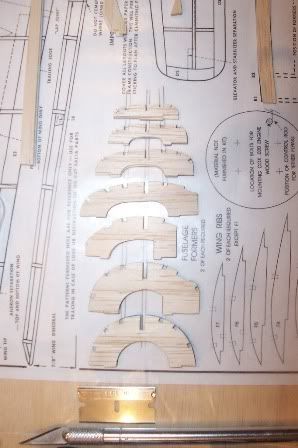
This one is 2005 production and the wood is so-so. The sheets with the wing parts are very good, each weighs 3 grams, but the sheets with the fuselage formers are 8 grams each. That's about 17 to 18 pound wood. For this one to fly, without 10 grams of BB shot in the nose, the structure has to be reduced aft of the C.G. and built with contest grade (4-5 pound) wood. Even then, it may need the lifting tail.

Compounding this is the tiny nose. Hurricanes were a little short coupled in the front, and had very pointy noses. At this scale, there is almost no room for a sturdy under structure to support thrust adjustments. It probably would have been much better if the design of the model used an all wood structure without the plastic cowling. One solution is an adjustable thrust button such as the one from Gizmo Geezer.

I'm going to be doing mine as a 56 Squadron bird with the Night and White colors. I don't have the time that you do for building but I will try to keep up.

Howard
kittyfritters
 
Posts: 697
Joined: Tue Jan 03, 2006 6:58 pm
Location: California

Postby scigs30 » Wed Mar 12, 2008 11:14 pm

Image
Image
scigs30
 
Posts: 844
Joined: Mon Nov 06, 2006 11:31 am

Re: 500 Series FW-190 Build

Postby Bill Gaylord » Fri Feb 10, 2012 11:07 pm

Looks good Scigs. I searched and couldn't find too many of these little 190s.
Wish me luck when I finally get around to trying out my little rc version. I've attempted this plane before, so it's been a learning experience on mounting everything forward enough for cg setting.
You do not have the required permissions to view the files attached to this post.
Bill Gaylord
 
Posts: 904
Joined: Sun Nov 09, 2008 1:29 pm
Location: Grove City PA

Re: 500 Series FW-190 Build

Postby flash52 » Sun Feb 12, 2012 3:37 am

Your Butcher Bird looks sweet! What do you have installed for RC gear ?
flash52
 
Posts: 67
Joined: Tue Mar 10, 2009 5:31 pm
Location: Wichita,KS

Re: 500 Series FW-190 Build

Postby mustangman » Sun Feb 12, 2012 2:23 pm

Here is some pics of my FW-190 , please feel free to comment! http://s1199.photobucket.com/albums/aa474/bosstang70/
mustangman
 
Posts: 103
Joined: Mon Sep 21, 2009 11:25 pm
Location: Wisconsin

Re: 500 Series FW-190 Build

Postby Bill Gaylord » Fri Feb 17, 2012 12:06 am

Bossman I like your little Stuka. I have one on YouTube on my WTFLYR channel. I thought it would be difficult, but it turns out to be a great litte rc flyer.

flash52 wrote:Your Butcher Bird looks sweet! What do you have installed for RC gear ?
Thanks. The servos are all Blue Arrow 2.5 gram servos. The receiver is a nice little 72MHz unit that is low priced, that has worked well for me in the past. http://www.bphobbies.com/view.asp?id=C2310004&pid=C2680119
Pentium 6A speed control and several small 2 and 3 cell lipos, which I'll have to determine which works best. The ESC is a 2s ESC, but they have been proven to work on 3s also. This is the motor used in the link, although there are several motors in the 10gm range that work well. http://www.hobbypartz.com/88e-mm201-c10-bl-motor-2900kv.html The 10 gram Hextronik motor sold by HK and other distributors is also a favorite.
Bill Gaylord
 
Posts: 904
Joined: Sun Nov 09, 2008 1:29 pm
Location: Grove City PA

Next

Return to General Building Questions

Who is online

Users browsing this forum: Bing [Bot] and 87 guests