Covering and walking the rails
48 posts
• Page 1 of 4 • 1, 2, 3, 4
![]() by Phugoid » Mon Sep 19, 2011 4:55 pm
by Phugoid » Mon Sep 19, 2011 4:55 pm
For me "stress wrinkles" aren't the result of badly attached tissue. Obviously wrinkles can occur for that reason, but what I would term a stress wrinkle is one that is caused by the deflection of the structure due to the stress of the tissue shrinking, thus causing an uneven tension in the tissue. Looking at the robust structures you cover, this is never likely to happen, and of course adding the additional structure is fine if you don't want to fly as you said
Since starting to used thinned PVA (as against the dope and thinners method), I've never had the tissue pull away and I regularly attach tissue to 1/16" stringers, no problems......, I did try a Glue stick ONCE - and never again as it barely seemed to hold the tissue at all.
Irrespective of flight or not, a better glue might save the odd tree here and there!
- Phugoid
- Posts: 952
- Joined: Wed Jan 20, 2010 8:17 am
![]() by Phugoid » Tue Sep 20, 2011 1:58 am
by Phugoid » Tue Sep 20, 2011 1:58 am
I build anything between a peanut and 24" span generally. Mainly from old british Kit Plans by Veron, Keilkraft, FROG etc I can post some pictures here but to be honest is a pain in the bum to do it!
My builds can be found either on the SFA or the Hip Pocket Aeronautics forums though.
Funny thing is that although they aren't Guillows kits on the whole, I use Guillows wood in them. The strip stock is so hard and rigid it makes perfect leading edges for peanuts and dimes, it's one of the reasons I buy the guillows kits
If I have chance at lunch today I'll upload some - or the links to them, there are a lot. Dave don't expect the sort of finish you get on your statics, I build to fly and I often build in the spirit of the original kit with a tissue finish and markings rather than the lovely detail you put into yours.
Andrew
- Phugoid
- Posts: 952
- Joined: Wed Jan 20, 2010 8:17 am
Tissue seams
![]() by granpa » Tue Sep 20, 2011 8:33 am
by granpa » Tue Sep 20, 2011 8:33 am
A few wrinkles I can live with, what I need help with are over lapping seams. They are rough and uneven.
granpa
- granpa
- Posts: 72
- Joined: Wed Feb 09, 2011 5:45 pm
- Location: Ellsworth WI
![]() by Phugoid » Tue Sep 20, 2011 2:35 pm
by Phugoid » Tue Sep 20, 2011 2:35 pm
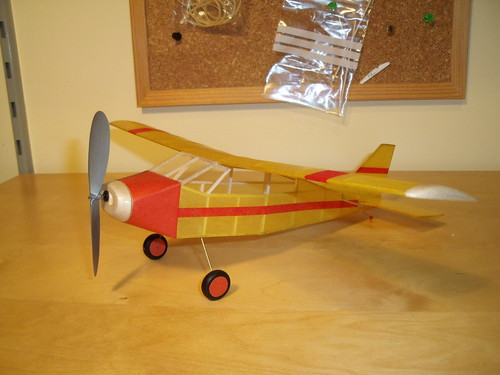
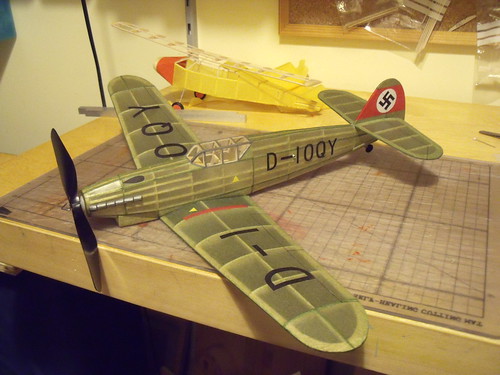
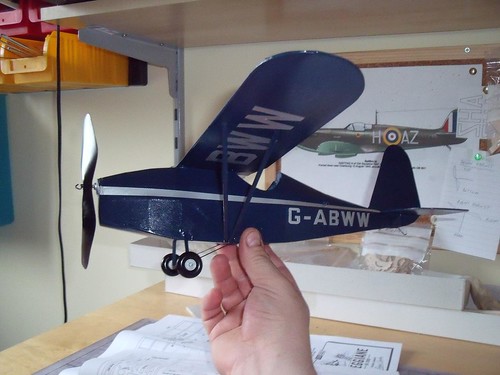
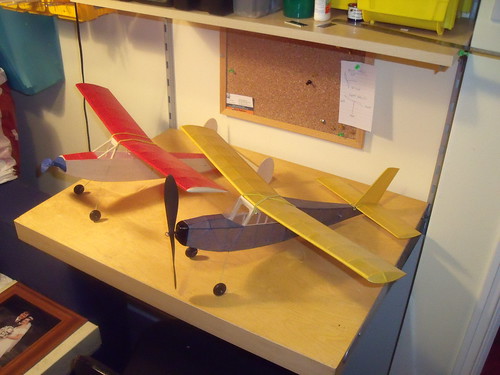
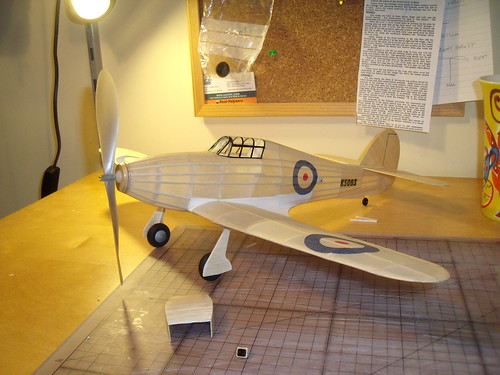
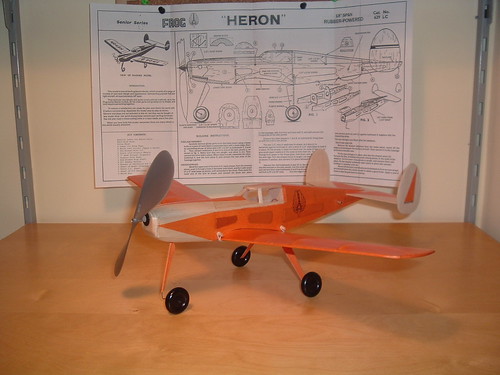
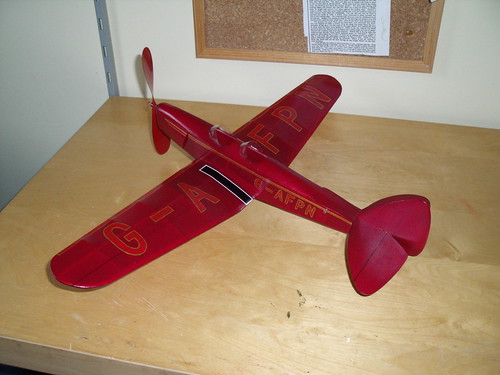
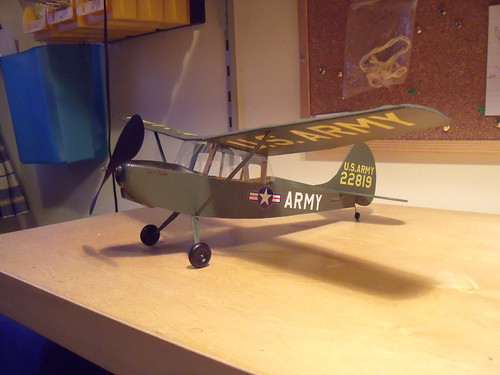
A few pictures:
Bede BD4 Peanut (designed by Bill Hannan)
Veron ME109 (sort of done as the Dora version)
Veron Jodel Bebe

Veron Comper Swift
West Wings Jade and Topaz (sports)
Keil Kraft Hawker Hurricane
FROG Heron (first Build after 25 years away from the hobby)
FROG Moth Minor
FROG Bird dog
Frog Redwing (my Favourite model - Flies for a minute like it's on rails)
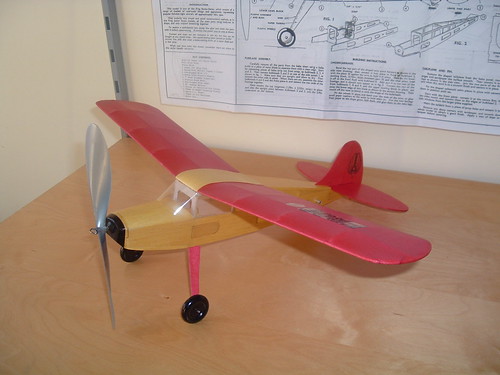
Not a wrinkle in sight!
Bede BD4 Peanut (designed by Bill Hannan)
Veron ME109 (sort of done as the Dora version)
Veron Jodel Bebe
Veron Comper Swift
West Wings Jade and Topaz (sports)
Keil Kraft Hawker Hurricane
FROG Heron (first Build after 25 years away from the hobby)
FROG Moth Minor
FROG Bird dog
Frog Redwing (my Favourite model - Flies for a minute like it's on rails)
Not a wrinkle in sight!
- Phugoid
- Posts: 952
- Joined: Wed Jan 20, 2010 8:17 am
![]() by Phugoid » Tue Sep 20, 2011 2:58 pm
by Phugoid » Tue Sep 20, 2011 2:58 pm
All of the models I posted pictures of fly, and fly well. A few examples:
http://youtu.be/pKewA6ZFbZc
http://youtu.be/LBC77utUjkg
http://youtu.be/0A1q1wv9ZiM
http://youtu.be/vtHMiMglnSY
http://youtu.be/pKewA6ZFbZc
http://youtu.be/LBC77utUjkg
http://youtu.be/0A1q1wv9ZiM
http://youtu.be/vtHMiMglnSY
- Phugoid
- Posts: 952
- Joined: Wed Jan 20, 2010 8:17 am
![]() by cliffm » Tue Sep 20, 2011 9:44 pm
by cliffm » Tue Sep 20, 2011 9:44 pm
Beautiful builds and fantastic flyers,you truly have a science going,and I am thinking you use nitrate for finish? The critical accuracy involved in the construction of the flying models has so far escaped my grasp, I can get them to resemble a flying airplane to some degree but the flying part has met with utter destruction and one total loss( it disappeared in an updraft) which I may some day call a success at flying,but, I think you have to find them first. Anyways,nice builds.
- cliffm
- Posts: 370
- Joined: Fri Feb 27, 2009 11:08 am
- Location: fairdale N D
![]() by Phugoid » Wed Sep 21, 2011 3:21 pm
by Phugoid » Wed Sep 21, 2011 3:21 pm
David,
The Bird dog, Moth Minor, Topaz and Jade are the same wingspan (or close to) that of your West wings Spitfire (I've built that one too.) so not quite soo little eh?
Cliff,
There's a lot of info out there on getting these things to fly. To be honest you are going to struggle to get a guillows kit to fly, mainly because of the weight of the wood in the kits, the quality of the rubber and the general undersizing of the Propeller.
I don't know what you've built, but If you've had trouble getting airbourne, rewind a little and try one of the simper high winged kits like the piper super cub, or cessna 180.. they are different in most respects to the typical guillows kits, as the designs are light, and the prop is big enough to get somewhere.
The finish is Banana oil, a thin non shrinking dope, none of the shrinking was done with the dope, only water.
Grandpa, Can you get some pictures for me to see what you mean? Rough edges can be the result of using the incorrect tool to cut the tissue. For me only razor blades are sharp enough to deal with tissue not even a scalpel is sharp enough.....
Andrew
- Phugoid
- Posts: 952
- Joined: Wed Jan 20, 2010 8:17 am
![]() by cliffm » Thu Sep 22, 2011 10:10 pm
by cliffm » Thu Sep 22, 2011 10:10 pm
Sorry if I mislead you on my model experience or knowledge,but my flying days were back in the later 50's, last one a free flight gas with too big a tank,it may still be soaring somewhere. My chasing airborne toys is long gone because of a severely messed up back. I still get around alright,but not for any extended period of time or distance. My main interest is in scale replicas. I am collecting parts and pieces for a 103 legal ultra light but that's for another forum. It seems banana oil was used quite a bit in the early days of aviation with good results. Thank you for your response. Later
- cliffm
- Posts: 370
- Joined: Fri Feb 27, 2009 11:08 am
- Location: fairdale N D
![]() by ADW 123 » Thu Sep 22, 2011 11:11 pm
by ADW 123 » Thu Sep 22, 2011 11:11 pm
echoing phugoid, you do want to use the sharpest tools to cut your tissue. overlaping seams are very hard to deal with (i still have pleanty of issues with them)
you want to first make sure that the seam is running on the edge of a piece of balsa. it is easier to make it look smoother if the seam is located on a longerone, former, or rib (on the usual 1/16" standard thickness for most). when i cover, i make sure that the tissue is glued to just one side of the edge where the overlap is. you must be very neat with your glue, otherwise tissue will stick where you dont want it to. once dry, you should cut away the excess tissue, in as much of a straight line as possible. there should now be a little edge of tissue that isnt stuck down to that balsa edge where the overlap is. to ensure a neat seam, you must first neatly apply glue (all of this glue talk is thinned 50/50 of course) and work the brush underneith the tissue edge that has not been glued down, so it sticks. take your finger and flatten gently, and get excess glue off. let it dry. then, use fine grade sandpaper to smooth out the seam.
the reason you want to make sure that the overlap will be on a piece of wood, is so that sanding is much easier, and much smoother. it is often hard to get at seams when they are dipping under the formers and longerons as tissue so often tends to do.
im no expert, but i feel like this is a pretty decent method. i dont think other methods are very different but...
- ADW 123
- Posts: 1158
- Joined: Mon Feb 22, 2010 5:22 pm
- Location: Cincinnati, Ohio
Seams
![]() by granpa » Fri Sep 23, 2011 9:58 am
by granpa » Fri Sep 23, 2011 9:58 am
Since I am photo posting challenged,there will be no pictures. My problem I think is applying the glue in a perfectly straight line on the stringer or former. I use 50/50 Elmer's and and a super fine round pointed brush but the glue is not applied consistently along the surface because the nature of a brush which applies more glue at the beginning of the stroke than the end.
I use razor blades to trim. Of course I could too shaky but there are guys over 75 who build some pretty nice seams. Thanks in advance....Dennis
I use razor blades to trim. Of course I could too shaky but there are guys over 75 who build some pretty nice seams. Thanks in advance....Dennis
granpa
- granpa
- Posts: 72
- Joined: Wed Feb 09, 2011 5:45 pm
- Location: Ellsworth WI
Seams
![]() by granpa » Fri Sep 23, 2011 9:59 am
by granpa » Fri Sep 23, 2011 9:59 am
Since I am photo posting challenged,there will be no pictures. My problem I think is applying the glue in a perfectly straight line on the stringer or former. I use 50/50 Elmer's and and a super fine round pointed brush but the glue is not applied consistently along the surface because the nature of a brush which applies more glue at the beginning of the stroke than the end.
I use razor blades to trim. Of course I could too shaky but there are guys over 75 who build some pretty nice seams. Thanks in advance....Dennis
I use razor blades to trim. Of course I could too shaky but there are guys over 75 who build some pretty nice seams. Thanks in advance....Dennis
granpa
- granpa
- Posts: 72
- Joined: Wed Feb 09, 2011 5:45 pm
- Location: Ellsworth WI
![]() by Phugoid » Fri Sep 23, 2011 10:41 am
by Phugoid » Fri Sep 23, 2011 10:41 am
Sorry Cliffm, I misinterpreted what you were saying.
Grandpa, the lack of pictures is a little problematic (a thousand words and all that)
I never get the same amount of glue on the seam, it's impossible. On the overlaps I do one of three things:
1) Use a pencil to mark the tissue at the overlap and cut it to the correct size before I apply it.
2) Attach the tissue just at one end, then smooth it into position with a piece of thin, clear cake box lid (Acetate) between the seam and cut the tissue lightly onto the cake box lid, this allows you to cut along the seam, without cutting the existing piece of tissue
3) Swap my method on a tricky stringer to the dope and thinners method. The dope is thick and does not bleed onto the the tissue that has been placed already. This means no marking out, but means you have to be able to accurately cut down the middle of a 1/16" stringer, which does rather jangle ones nerves!
Andrew
- Phugoid
- Posts: 952
- Joined: Wed Jan 20, 2010 8:17 am
Seams - controlling glue line
![]() by granpa » Fri Sep 23, 2011 12:16 pm
by granpa » Fri Sep 23, 2011 12:16 pm
Andrew, Option 2 appeals to me. Could you explain "cut lightly" for me?
granpa
- granpa
- Posts: 72
- Joined: Wed Feb 09, 2011 5:45 pm
- Location: Ellsworth WI
![]() by Phugoid » Fri Sep 23, 2011 2:04 pm
by Phugoid » Fri Sep 23, 2011 2:04 pm
Hi Granpa (In typing that it reminded me of both of mine, they have long since left us - god bless em!),
The acetate should be enough to act as a backing for a light cut. I think what I'll do is wait until I build a model with a stringered fuselage and take some pictures for you if you like. It's the 75th aniversary of the most beautiful aircraft ever designed (IMO) the Spitfire. Thus I feel a yearning to build one, and it has a stringered fuselage so I'll take some pictures of that if you like (it won't be the Guillows one though I'm afraid)
I'll give you a shout when I do, I have a feeling it won't be long though....
- Phugoid
- Posts: 952
- Joined: Wed Jan 20, 2010 8:17 am
48 posts
• Page 1 of 4 • 1, 2, 3, 4
Return to General Building Questions
Who is online
Users browsing this forum: Bing [Bot] and 21 guests