Another Cessna 180

Ask other modelers for a little help / knowledge ?

Another Cessna 180

Postby scigs30 » Tue Oct 05, 2010 12:47 am

While I was awaiting for my Dumas Corsair to arrive, I decided to start on an easy and fast build. The wood was pretty good weighing in at 8-9 lb/ft. The notches were over-sized and the strip wood was 1/16th thick, would have been better if it was 1/20th. That's OK, I just sanded it down. The build went fast and as you can tell it is built per the plans with no mods. On Guillows porous wood, I like to use Testors Cement instead of Elmers Glue all, especially now after Elmers has changed their formula. My hobby store was out of Testors so I bought Sig-Ment instead. In all my years of building I have never tried this stuff. It worked great and dries clear, and that's important to me. I like to have a clean build with no glue showing for the pictures. Total weight so far as shown is 19 grams. I still have to do some fine sanding and will add some supports to prevent wrinkles when the tissue shrinks. I am not using the supplied tissue of gray and white.......Guillows what ever happened to the Blue and Yellow? Any way I am going to use Blue and Yellow Tissue to finish this plane.
Image
Image
Image
Image
Image
Image
scigs30
 
Posts: 844
Joined: Mon Nov 06, 2006 11:31 am

Postby Phugoid » Tue Oct 05, 2010 7:10 am

You sure do build fast! Nice work.

I have this one in my cupbaord for another day.....
Phugoid
 
Posts: 952
Joined: Wed Jan 20, 2010 8:17 am

Postby scigs30 » Thu Oct 07, 2010 11:26 pm

I finished my build, nice fast and easy. Final weight balanced out is around 25grams. I finished to the same color as shown on the box and no real modifications, built straight from the box. I covered with pre shrunk Esaki tissue and brushed on 2 coats of clear dope. I added a couple of brass washers so the prop will clear the nose.
Image
Image
Image
Image
Image
Image
Image
Image
Image
Image
Image
scigs30
 
Posts: 844
Joined: Mon Nov 06, 2006 11:31 am

Postby Phugoid » Fri Oct 08, 2010 8:57 am

Very neat Scigs, look forward to seeing it fly. The weather is awful over in the old world so my latest hasn't been outdoors yet. Probably not so bad weather in your neck of the woods?

I've got over the prop clearence issue with some platic spacers, one of which I've put some sidethrust into as I always start with a bit. Since this is similar to mine I'd be interested to know what side thrust you trim out to. What are you going for rubber wise? I was thinking 3/16"? 1.5x prop to hook......

Andrew
Phugoid
 
Posts: 952
Joined: Wed Jan 20, 2010 8:17 am

Postby scigs30 » Fri Oct 08, 2010 9:54 am

I am also going with 3/16 rubber for flight. Right now it is nose heavy so instead of adding weight to the rear, I am going to use a Peck prop that is over a gram and half lighter.
scigs30
 
Posts: 844
Joined: Mon Nov 06, 2006 11:31 am

Postby Phugoid » Fri Oct 08, 2010 10:38 am

I've just balanced mine out, the AUW is 32g with rubber as described I did not add any weight anywhere which is good.

In my indoor glide test lab (from the door of the bedroom onto the bed) the glide looks good, I'm hoping for a spot of good weather this weekend for some proper flying......
Phugoid
 
Posts: 952
Joined: Wed Jan 20, 2010 8:17 am

Postby lukebozek1 » Sat Oct 09, 2010 8:08 am

Very very nice. I am having trouble with covering this wing design while while doing the Javelin. The leading edge does not give me enough surface area to get a good area to attach to and I am getting stress areas in the tissue. I tried your approach on attaching at opposite points and slowly working around the perimeter. I am hoping that doping might take some out. Also the humidity in Florida is going down, but still at 75%. Very frustrating. Can this Guillows tissue be applied wet?
lukebozek1
 
Posts: 136
Joined: Fri Jul 09, 2010 8:34 am
Location: Hobe Sound Florida

Postby scigs30 » Sat Oct 09, 2010 11:56 am

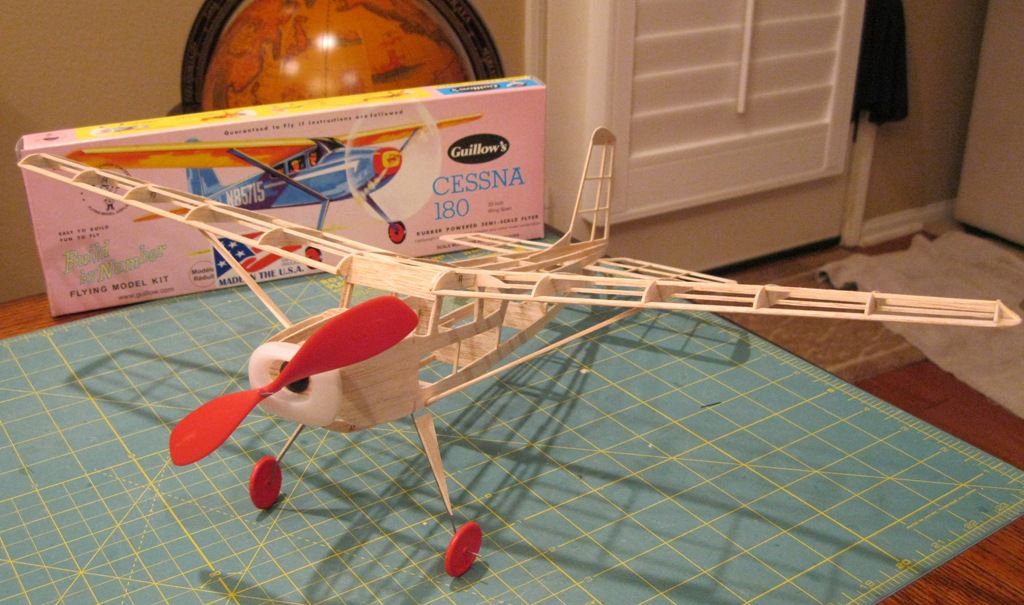
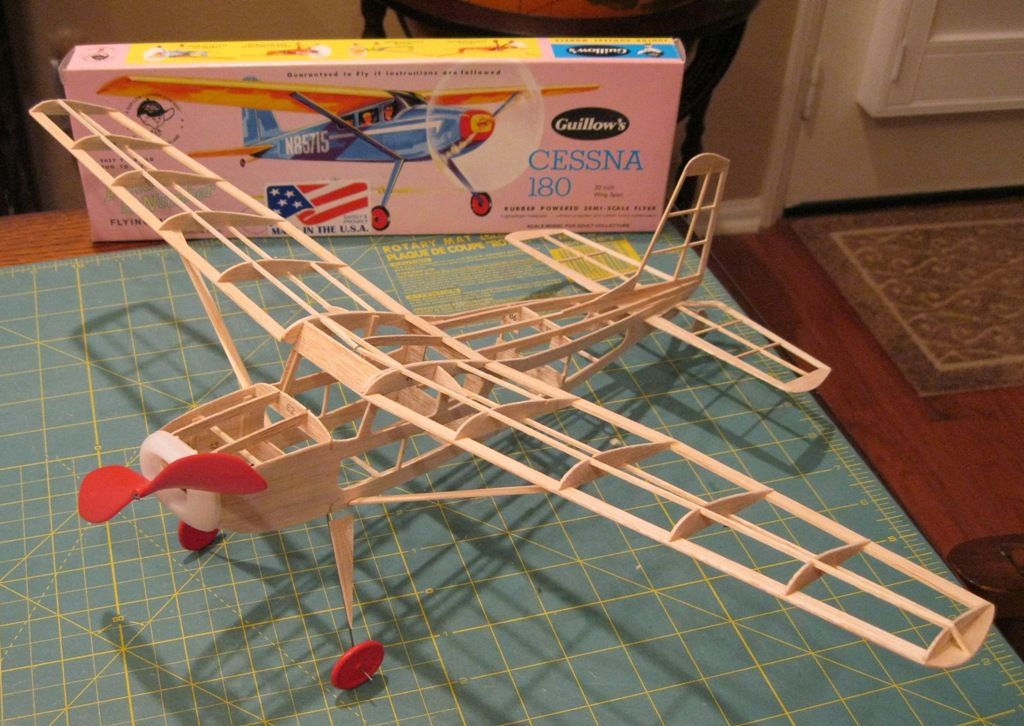
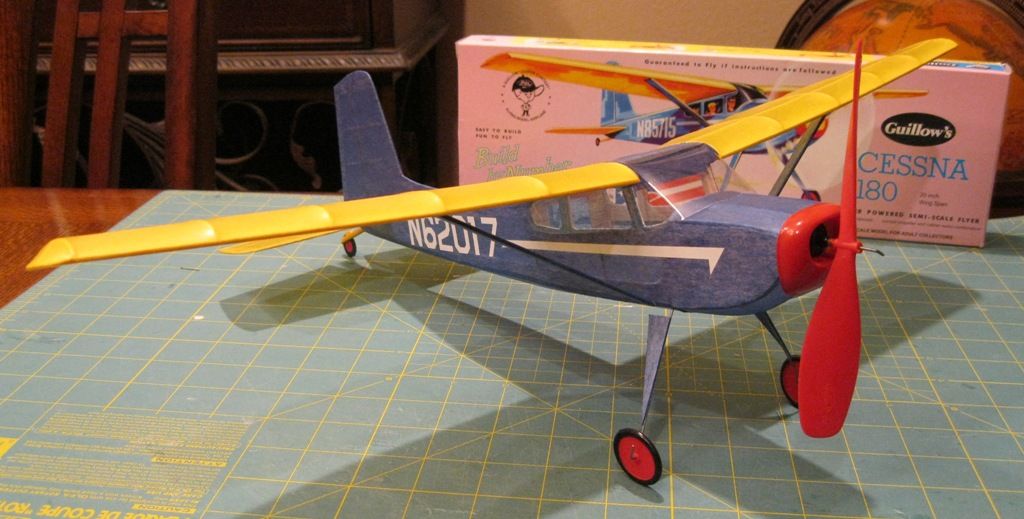
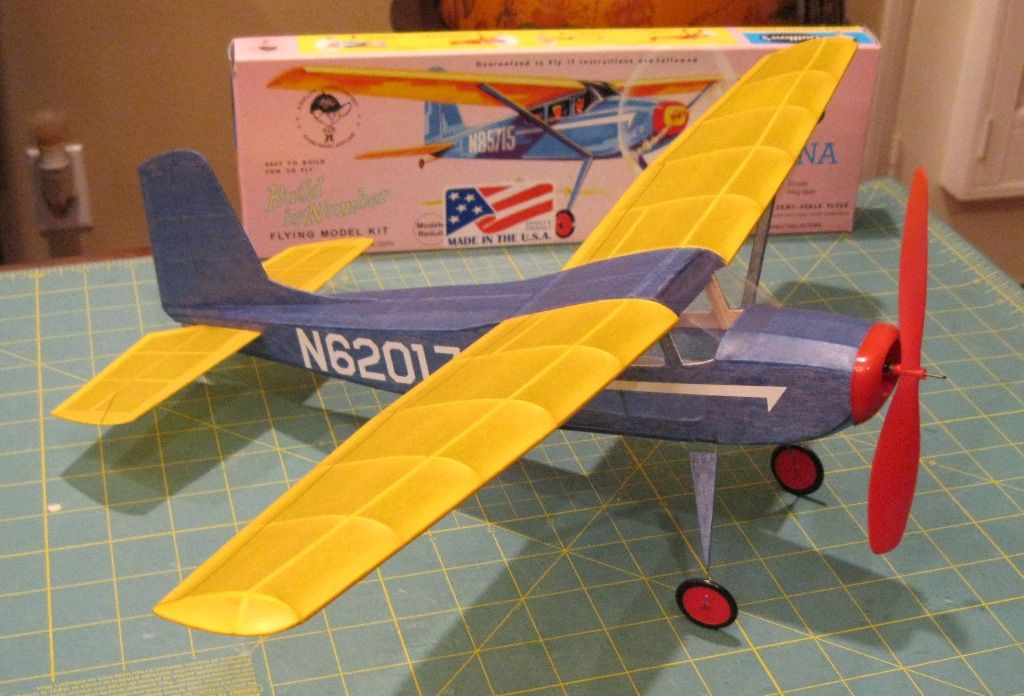
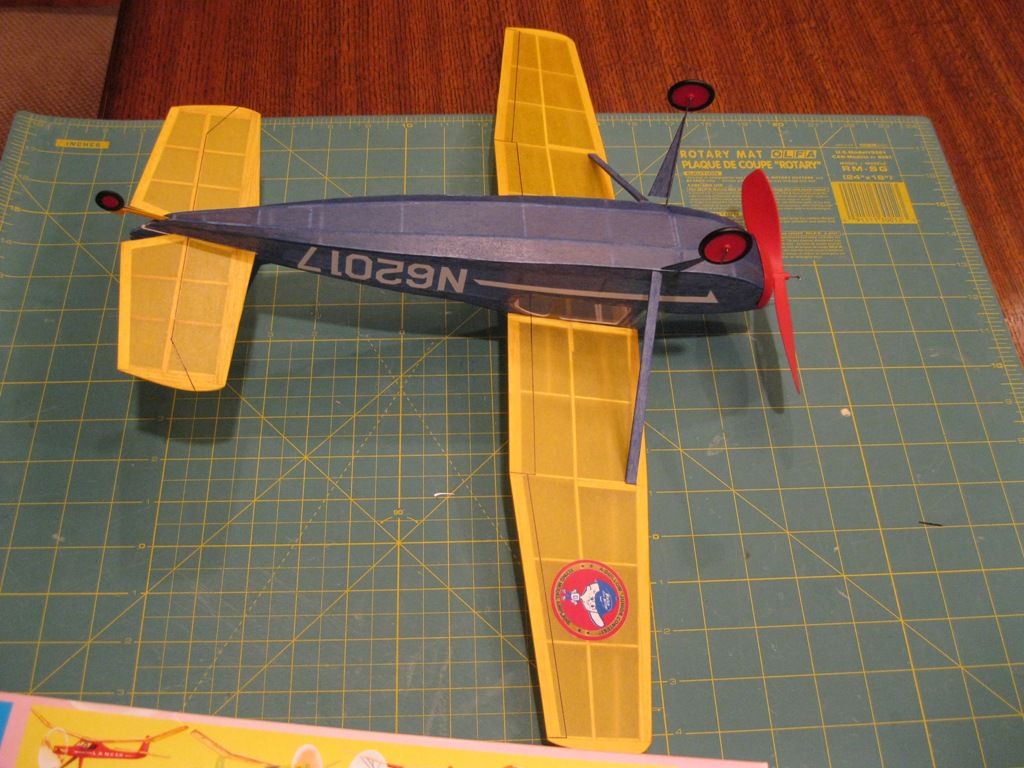
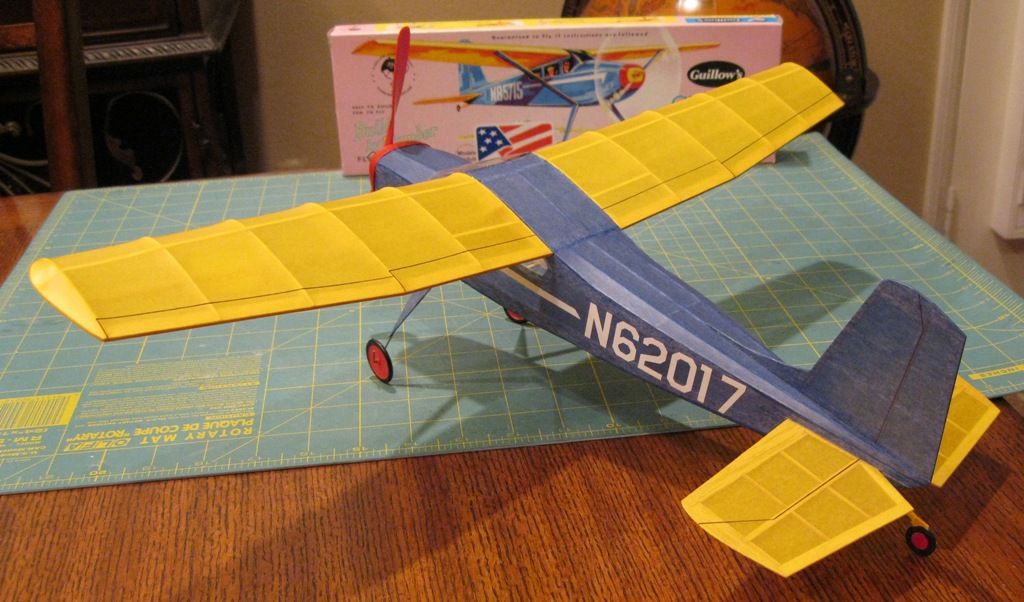
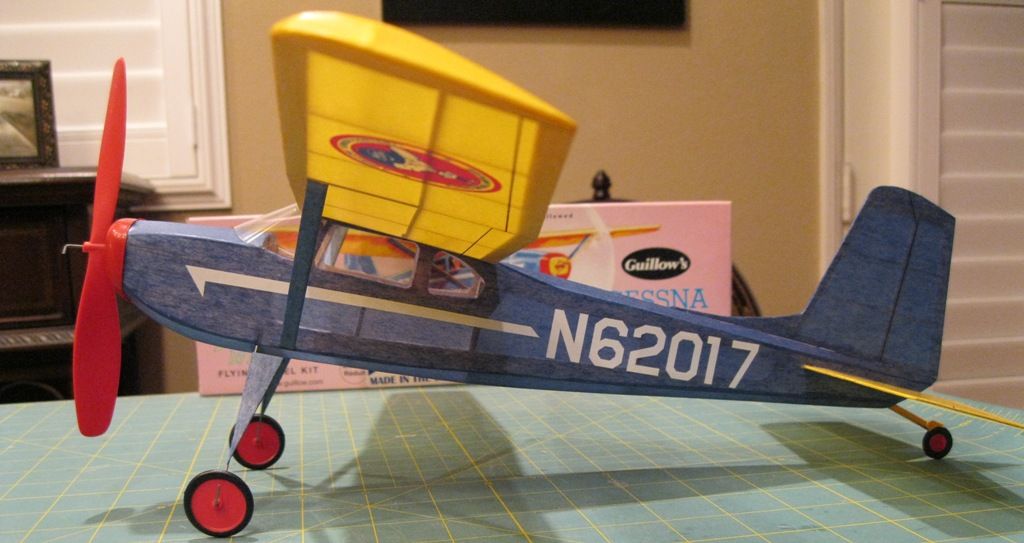
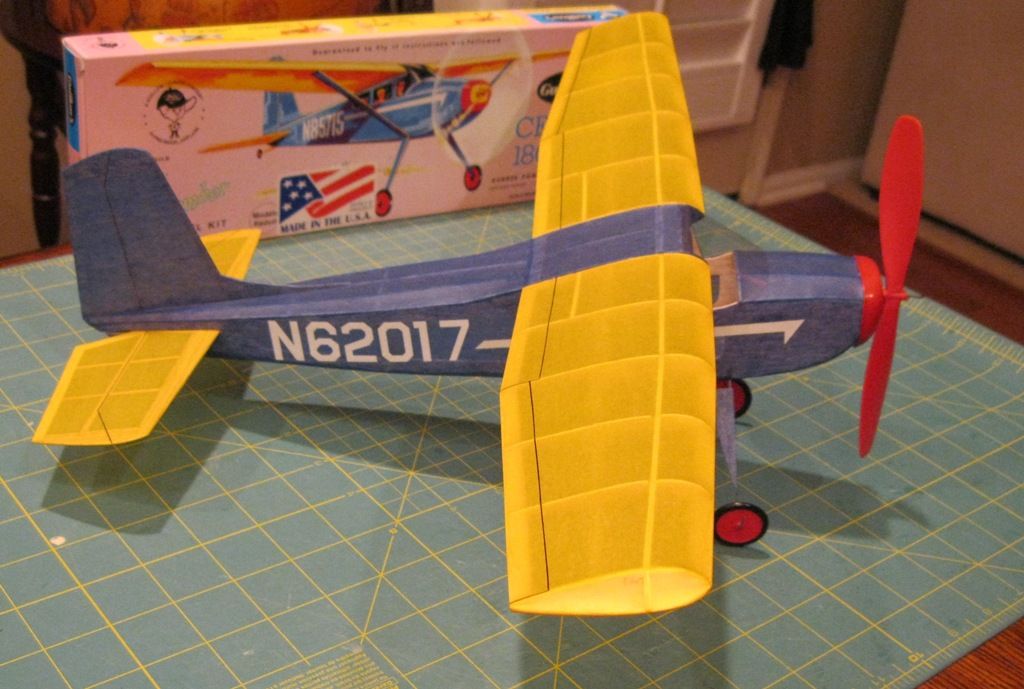
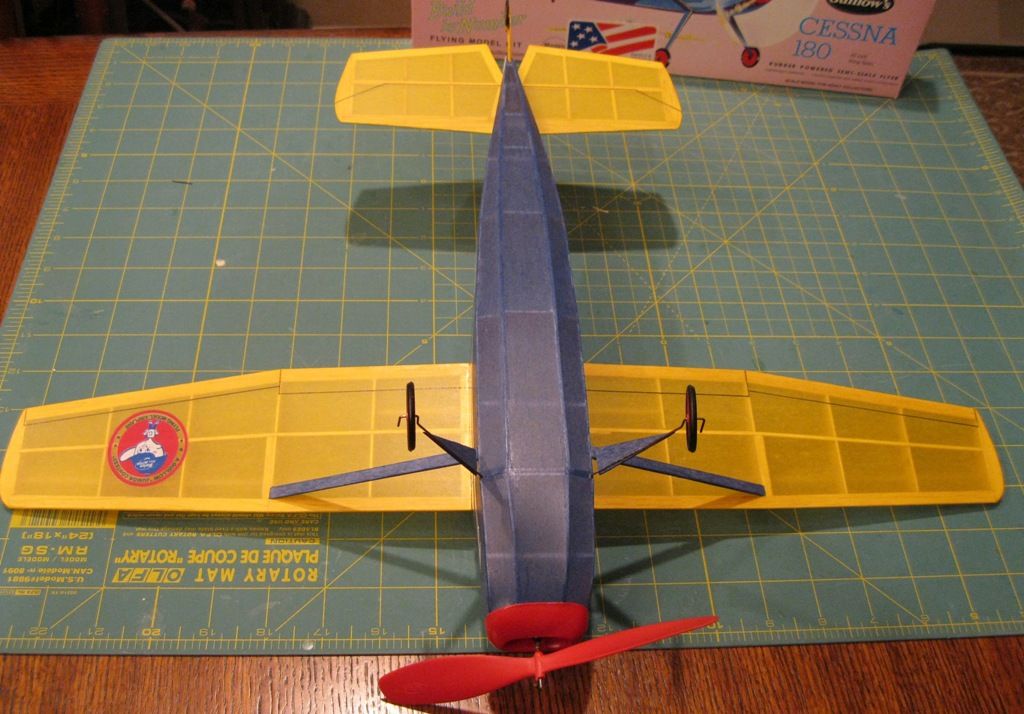
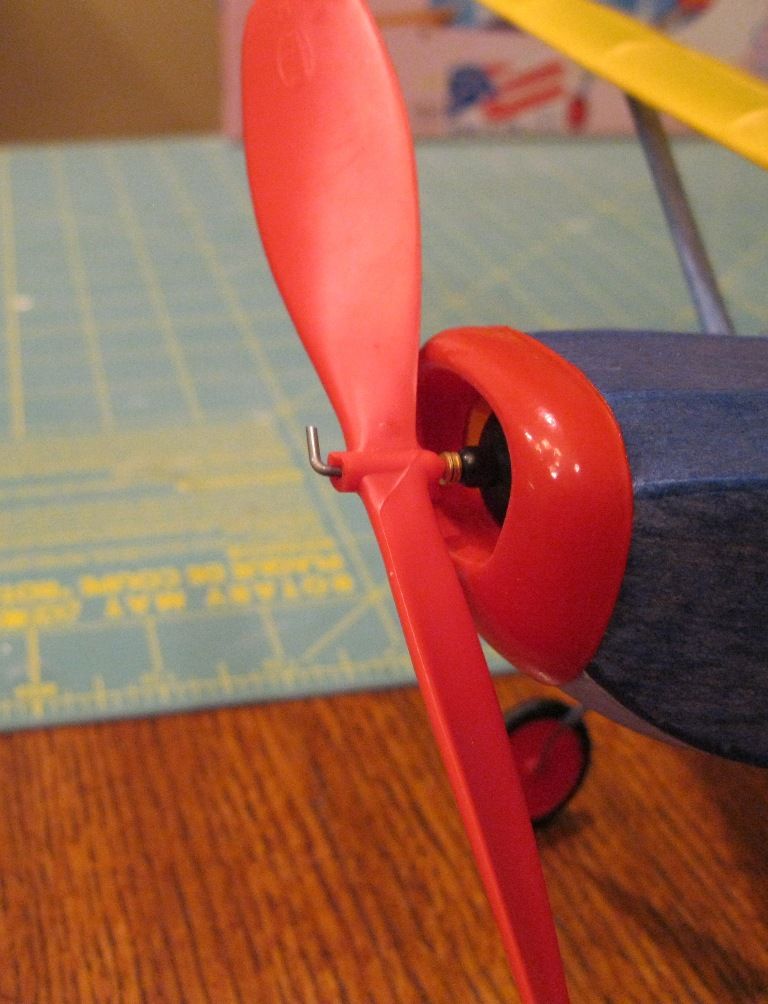
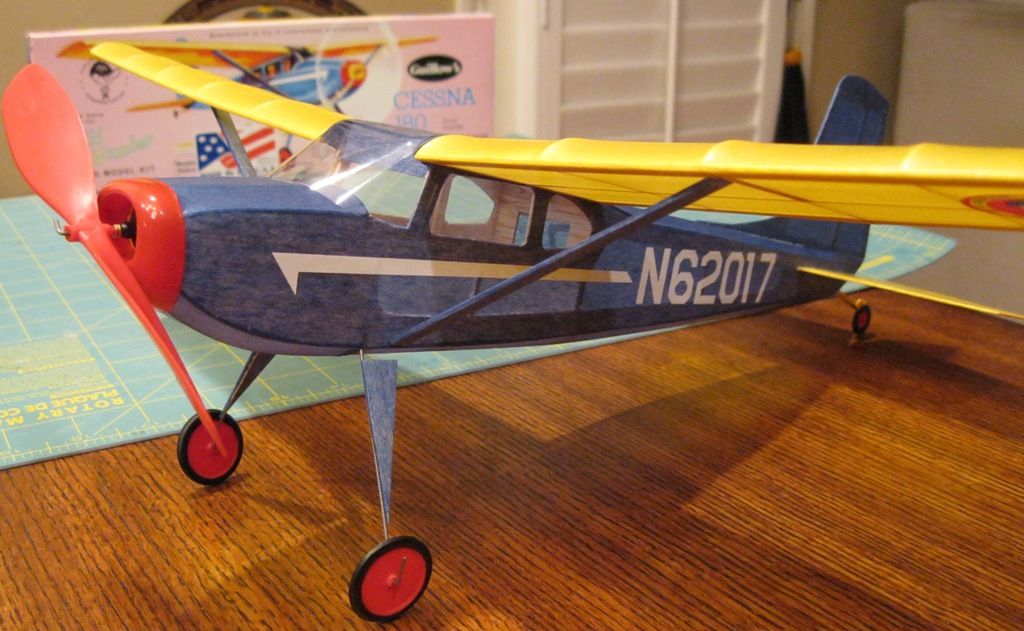
There are only a couple of complaints I have about this kit and the leading edge is one of them. The 1/8 X 1/16th balsa is not the problem it is the radical curvature of the ribs themselves. The easiest solution is to just sand the front of the ribs so they have less of a curve. This was a tough one for me to cover and you really have to pay attention to how you are pulling the tissue. This is one of the few times were you think the covering looks nice and tight then you try to shrink it. Then you start to see all these so called crow feet wrinkles appear. The reason they appear is because you have too much slack in the tissue at the leading edge. What I did is after I applied the tissue, I felt the leading edge with my finger to make sure it is nice and tight. Once I was convinced it was tight, then I sprayed it with water to shrink it. Also with this much curvature and spread out ribs, you will get the sunken in look between the ribs. The other problem I have is what everyone else is saying about the prop not clearing the nose cowl....This is an easy fix by Guillows to just add small washers like I did.
scigs30
 
Posts: 844
Joined: Mon Nov 06, 2006 11:31 am

Postby lukebozek1 » Sat Oct 09, 2010 12:17 pm

I am not in the same class as you. This plane looks perfect. That leading edge is just a little different, not like some of the kits with a solid spar. And the curvature is noticable. But thanks for the tip. I may use a lot more excess tissue this time and try to get it as tight as possible. I love looking at your builds, very smooth and well finished.
lukebozek1
 
Posts: 136
Joined: Fri Jul 09, 2010 8:34 am
Location: Hobe Sound Florida

Postby scigs30 » Wed Oct 13, 2010 4:56 pm

I was able to go across the street to the park and fly my Cessna today. What a great little flyer, almost lost her on the second flight in a thermal. My wife got some pictures of it being tossed out of the thermal when the rubber ran out. It has a trim tab so it flies in a left circle, but the thermal through her out to the right. I have a short video, was longer but cannot somehow lost it in Windows Movie Maker. I also flew my Comet North American Trainer. I used 3/16 rubber with a Peck Prop and she flew great. Took very little clay and little down thrust.
http://www.youtube.com/watch?v=JKOrwj0Yfr0
http://www.youtube.com/user/SCIGS30#p/a/u/1/PQJQp4IiSis
Image
Image
scigs30
 
Posts: 844
Joined: Mon Nov 06, 2006 11:31 am

Postby Phugoid » Wed Oct 13, 2010 5:15 pm

Nice flights Scigs. I wish we had your weather over here!
Phugoid
 
Posts: 952
Joined: Wed Jan 20, 2010 8:17 am

Postby Phugoid » Wed Oct 13, 2010 5:16 pm

Nice flights Scigs. I wish we had your weather over here!
Phugoid
 
Posts: 952
Joined: Wed Jan 20, 2010 8:17 am

Postby StefanJ » Mon Feb 28, 2011 8:00 pm

Very nice!

I'm in the middle of building a Cessna 180, my first build as an adult. Your build gives my something to shoot for.

I thought I'd done something wrong RE the heights between the die-cut pieces and stringer material. I'm sanding down the latter . . . after assembly.

Yeah, the supplied tissue colors are puzzling. Gray and white? Hmmmm. I have blue and yellow dope, but I was hoping to get away with just a couple of coats of clear.
StefanJ
 
Posts: 108
Joined: Mon Feb 28, 2011 9:46 am

Postby Phugoid » Tue Mar 01, 2011 7:45 am

yeah the pieces aren't that accurate, and a bit of adaption and sanding is always needed. The Piper Super Cub 95 (whicjh is in the same series) I built highlighted some of the fit problems on that, so I assume that the 180 will have similar problems.....
Phugoid
 
Posts: 952
Joined: Wed Jan 20, 2010 8:17 am

Postby ADW 123 » Tue Mar 01, 2011 11:04 am

all of those smaller cheaper planes have that, but they are great fliers and are great fast builds for practicing your covering. if you can cover a flimsy frame like that then guess how much easier it is to cover one that is much more sturdy... well... thats my 2 cents.
ADW 123
 
Posts: 1158
Joined: Mon Feb 22, 2010 5:22 pm
Location: Cincinnati, Ohio

Next

Return to General Building Questions

Who is online

Users browsing this forum: No registered users and 3 guests