600 Series Piper Super Cub 95

Ask other modelers for a little help / knowledge ?

Postby Phugoid » Sun Sep 12, 2010 5:17 pm

The trim away the excess tissue along the ribs at each end. At the end shown the the photo I do it in two steps, cutting from the spar to the LE and then from the spar to the TE, then along the spar itself:

Image

Image

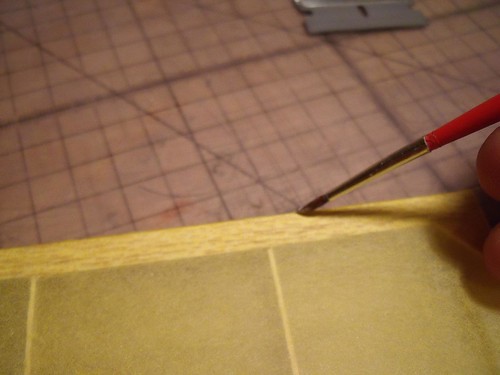
Go back along the edges at the LE and TE to make sure that there are no loose bits. Pushing the brush as if to try and lift the edge will reveal any loose bits and also coat them in glue:

Image

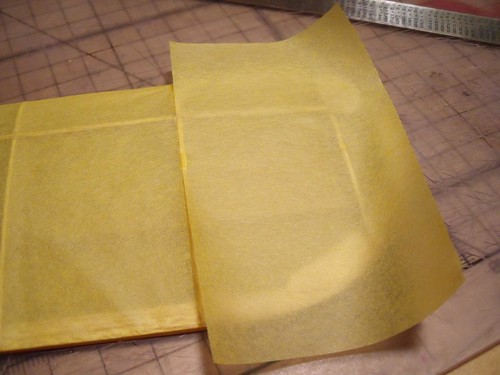
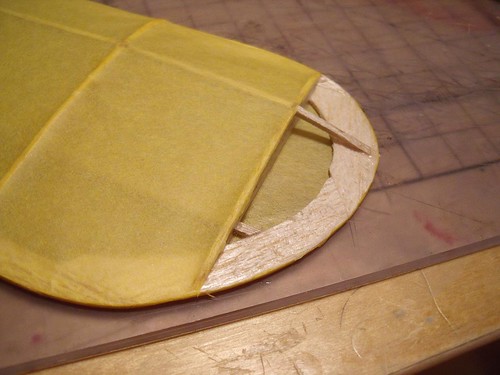
Cut a piece of tissue large enough to cover the gap between the fourth and fifth ribs (in this example at least) Make sure that the edge on the fourth rib is nice and straight, and tack all four corners like a miniature version of how we started things for the whole wing:

Image

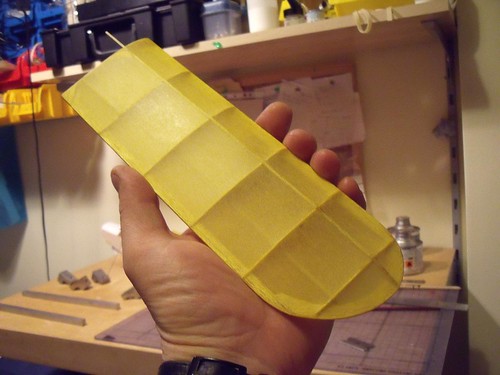
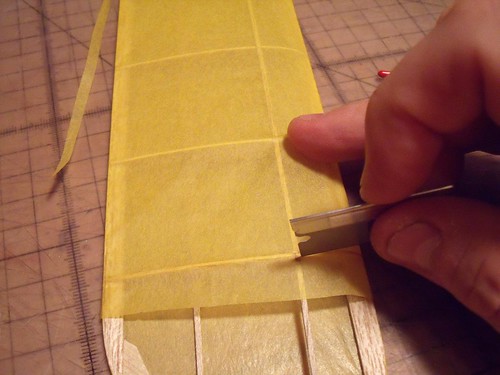
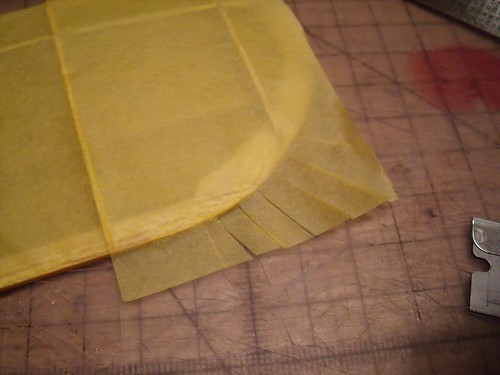
Because the TE is curved at this point, cut a series of lines into the tissue 1mm or so back from he TE, this allows the tissue to conform to the curved shape.

Image

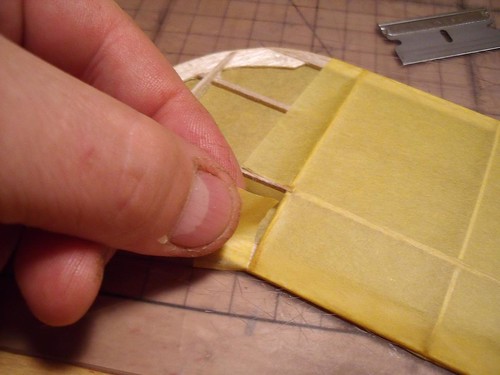
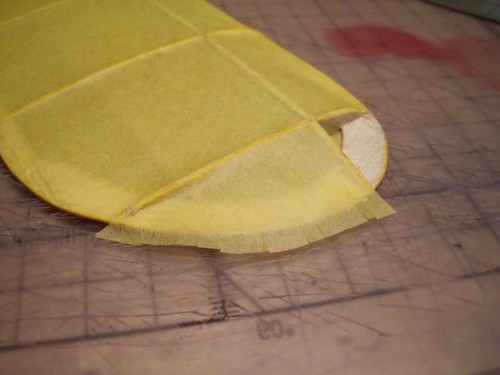
Attach and trim as before coaxing the tissue round the coner with your finger:

Image
Phugoid
 
Posts: 952
Joined: Wed Jan 20, 2010 8:17 am

Postby Phugoid » Sun Sep 12, 2010 5:34 pm

Attach two pieces of tissue at the tip cutting lines as before. You may notice a "dip" in the tissue at the rib TE. I realised this after taking the picture and pushed it up uisng a thin 6 inch rule inserted from the end to release the tissue, otherwise a nasty wrinkle would have happned:

Image.

The finished article ready for shrinking:

Image

Spray the water lightly and nice and even, I just use a cheap plant sprayer from Wilko (Wilko is a bit a bit like CVS in the States) Then hold the wing flat in a jig. I use a couple of bits of aluminium stock for this, and some scrap metal blocks, both from work. Anything that both raises the underside of the wing and keeps it flat is good. I say flat since I have inserted a little scrap piece of 1/16" of balsa under the traling edge at the wing tip. This is to give the wing a slight twist and is called washout, but I'm not going into that now.

Image

Leave to dry. If there are any little wrinkles at this point a little bit of local shrinking can be done. I use spit on a very soft brush (a bit disgusting I know) but perhaps whatever is in spit gives a tighter shrinkthen just plain water!
Phugoid
 
Posts: 952
Joined: Wed Jan 20, 2010 8:17 am

Postby Phugoid » Sun Sep 12, 2010 5:53 pm

Coat the bottom surface with the dope or banana oil using a nice soft brush. I don't use shrinking dope, I think it is it is too harsh. The bottom is done first so the dope has a bit of time to flash off whilst the top is coated, so it does not stick to the jig. Dope or Banana oil doesn't seem to like to stick to aluminium anyhow. The tissue always looks nice at this stage I think.

Image

The wing then gets put back in the jig, remembering to add the washout shim back in:

Image

Let everything dry for a while and here we go, one covered and wrinkle free wing. One down, one to go!

Image
Phugoid
 
Posts: 952
Joined: Wed Jan 20, 2010 8:17 am

Postby ADW 123 » Sun Sep 12, 2010 8:59 pm

so when you put the two dots of glue on the center part of two outer ribs, you dont put glue on the parts of the wing inbetween the two dots?
ADW 123
 
Posts: 1158
Joined: Mon Feb 22, 2010 5:22 pm
Location: Cincinnati, Ohio

Postby Phugoid » Mon Sep 13, 2010 1:05 am

no, just at the endribs and at the LE and TE roughly at centre span
Phugoid
 
Posts: 952
Joined: Wed Jan 20, 2010 8:17 am

Postby Phugoid » Mon Sep 13, 2010 2:50 am

What I did forget to mention right at the start was that I'd already covered the bottom of the wing first using the same method as the fin/tailplane....
Phugoid
 
Posts: 952
Joined: Wed Jan 20, 2010 8:17 am

Postby ADW 123 » Mon Sep 13, 2010 8:42 am

and when you put those dots of glue on, the tissue goes on, and you try to flatten it out as best possible
ADW 123
 
Posts: 1158
Joined: Mon Feb 22, 2010 5:22 pm
Location: Cincinnati, Ohio

Postby Phugoid » Mon Sep 13, 2010 10:24 am

Sort of, as you are only attaching it at those points you just make it gently taught along the line between the two dots in each direction. By doing this in two directions it sort of makes it so you are working from the centre when you then glue down each "corner flap"

That's the best way I can describe it!

The best thing to do is to build something and find out, get one of the cheaper simpler kits like a Bird Dog or Trojan to try it out on.
Phugoid
 
Posts: 952
Joined: Wed Jan 20, 2010 8:17 am

Postby ADW 123 » Mon Sep 13, 2010 10:27 am

ive got a little piper cub lined up (i think its the one ur building) after my sprit of saint louis maybe
ADW 123
 
Posts: 1158
Joined: Mon Feb 22, 2010 5:22 pm
Location: Cincinnati, Ohio

Postby Phugoid » Fri Sep 17, 2010 1:57 pm

I finished the other wing, disapointingly a got some small "crows feet" in the tissue where the the rib meets the TE and one where it meetrs the LE.

I also managed to accidentally puncture the tissue on the top of the wing, which I had to repair with a patch.

Not the best few days on this project then!

Today I've applied some paint to the wings, I've done it at this stage rather than after assembly to avoid having to mask things off because they are different colours.

I've not put much paint on at all, just enough to give an even colour, even though the paint was gloss, it looks quite matt, as it is very thin as I'm worried that too much paint will add too much weight as I think this model will already be quite heavy.

Image
Phugoid
 
Posts: 952
Joined: Wed Jan 20, 2010 8:17 am

Postby Phugoid » Sun Sep 19, 2010 5:04 pm

I've now covered the fuselage in red Esaki tissue. This has come out quite well.

Image
Phugoid
 
Posts: 952
Joined: Wed Jan 20, 2010 8:17 am

Postby scigs30 » Mon Sep 20, 2010 12:06 am

Good job, can't wait to see it done.
scigs30
 
Posts: 844
Joined: Mon Nov 06, 2006 11:31 am

Postby Phugoid » Mon Sep 27, 2010 2:28 pm

I finaly managed to get some work done on this again.

I decided I could not live with the wings so I gave them another coat of paint despite the weight penalty. This was less because of the matt finish, but more to do with the "dirty" or dark looking bits in the paint where it was thin. They do look a lot better now.

I've also now painted the fuselage and the fin. All of the painting so far has been done with an air brush using Humbrol enamels, thinned with celulose thinners. This is apart from the plastic nose piece which has been done with normal sparay enamel from a rattle can.

Image
Phugoid
 
Posts: 952
Joined: Wed Jan 20, 2010 8:17 am

Postby Phugoid » Tue Sep 28, 2010 6:08 pm

A bit more done. I've painted the wheels and the nose moulding, the latter has been glued in position with epoxy resin.

I've also made up the wing struts, I've left them a bit longer than the plan to allow for a bit of trimming.

The decals went on ok. Recently I've started using Humbrol "decal fix". This seems to work quite well. You apply it to the model before the decal, then after. It does seem to soften and draw the decal down exactly like it says on the bottle.

Image
Phugoid
 
Posts: 952
Joined: Wed Jan 20, 2010 8:17 am

Postby ADW 123 » Tue Sep 28, 2010 6:09 pm

whats the best way of painting the wheels. ive always had some trouble with messing up the color on the inside.
ADW 123
 
Posts: 1158
Joined: Mon Feb 22, 2010 5:22 pm
Location: Cincinnati, Ohio

PreviousNext

Return to General Building Questions

Who is online

Users browsing this forum: No registered users and 26 guests