Series 300 Piper Cub build
67 posts
• Page 3 of 5 • 1, 2, 3, 4, 5
![]() by scigs30 » Fri Mar 27, 2009 12:34 pm
by scigs30 » Fri Mar 27, 2009 12:34 pm
I am almost done with the stringers and everything is going smooth. I had to enlarge the opening in formers BB and B7 so the rubber would pass through. As far as the plan showing dihedral, I looked everywhere on the plan and don't see it. The cabin goes on vertical and is a square box so there is no dihedral there. The wings show the first rib being vertical as well. The only slant I see is the front view of the wing, but that slant is just showing the angle of the rib from horizontal. Now I could be missing it but from what I see there is no dihedral. Most Guillows kits that I have built show dihedral and yes you still have to add a little more for a stable flight. I will post how much dihedral to add for this kit when I get to the wing.
- scigs30
- Posts: 844
- Joined: Mon Nov 06, 2006 11:31 am
![]() by John G. Jedinak » Fri Mar 27, 2009 5:46 pm
by John G. Jedinak » Fri Mar 27, 2009 5:46 pm
HMMMM This is a top winged plane, Do top winged planes demand dihedral????
- John G. Jedinak
- Posts: 160
- Joined: Mon Dec 19, 2005 6:50 pm
- Location: Fort Wayne, Indiana
![]() by supercruiser » Fri Mar 27, 2009 7:37 pm
by supercruiser » Fri Mar 27, 2009 7:37 pm
On my plans for the #309 Cessna 150 there is an note for the wing strut pieces K1. The drawing shows two lengths for the strut. The longer length is for a flying model. If I remember correctly, this does give a dihedral amount at the tips of about 5/16". Since the Cub and 150 kits are very similar I would think that note would be on both plans. 
- supercruiser
- Posts: 405
- Joined: Wed Jun 15, 2005 8:47 am
![]() by scigs30 » Sat Mar 28, 2009 12:45 am
by scigs30 » Sat Mar 28, 2009 12:45 am
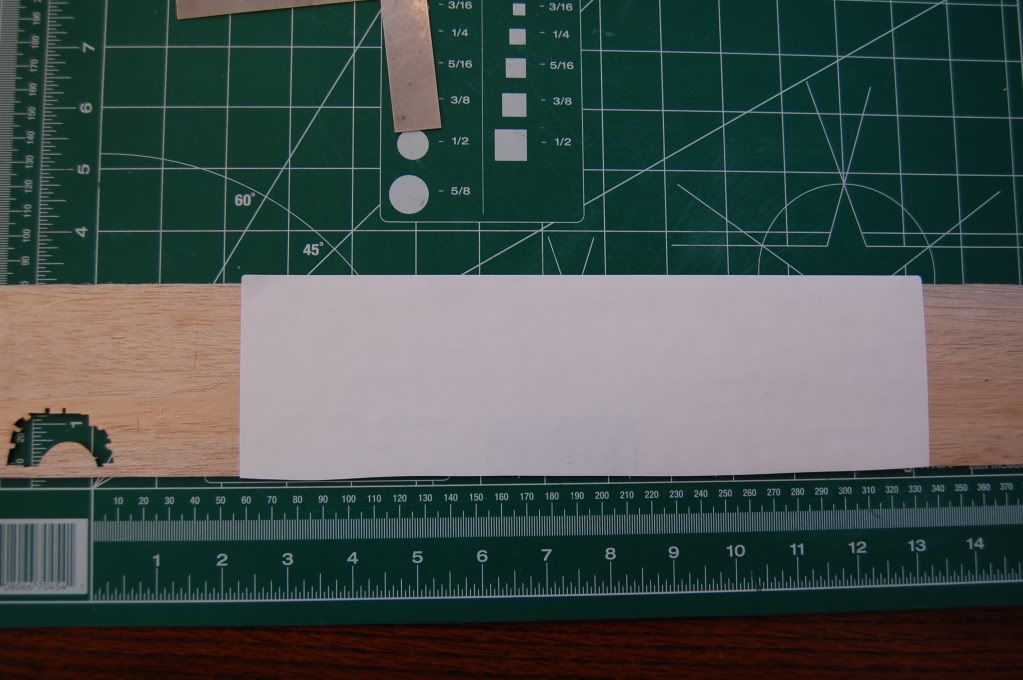
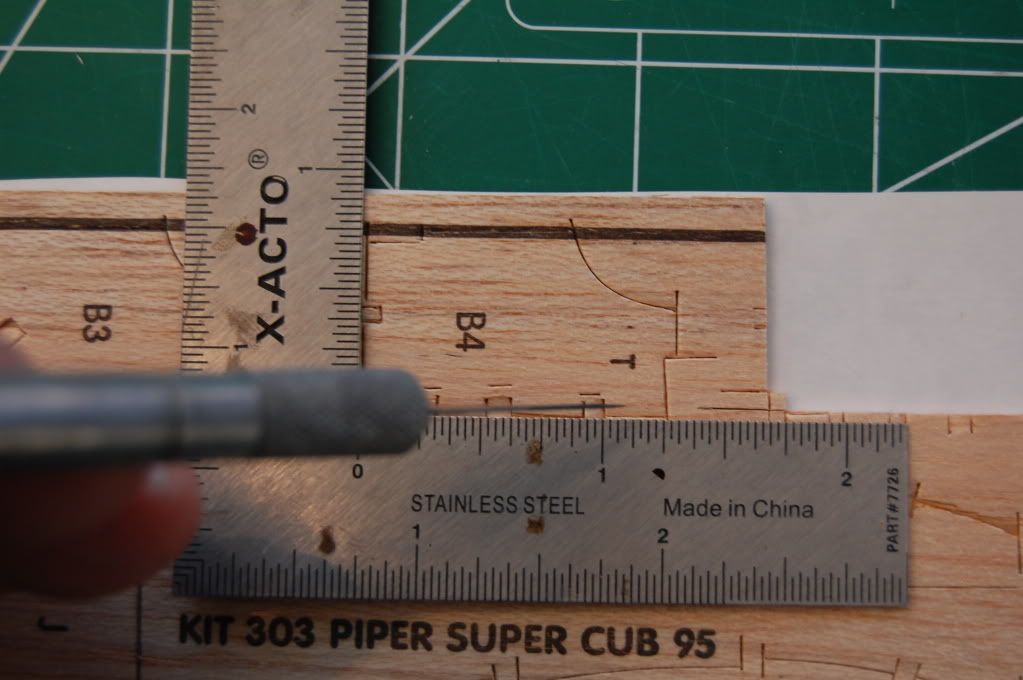
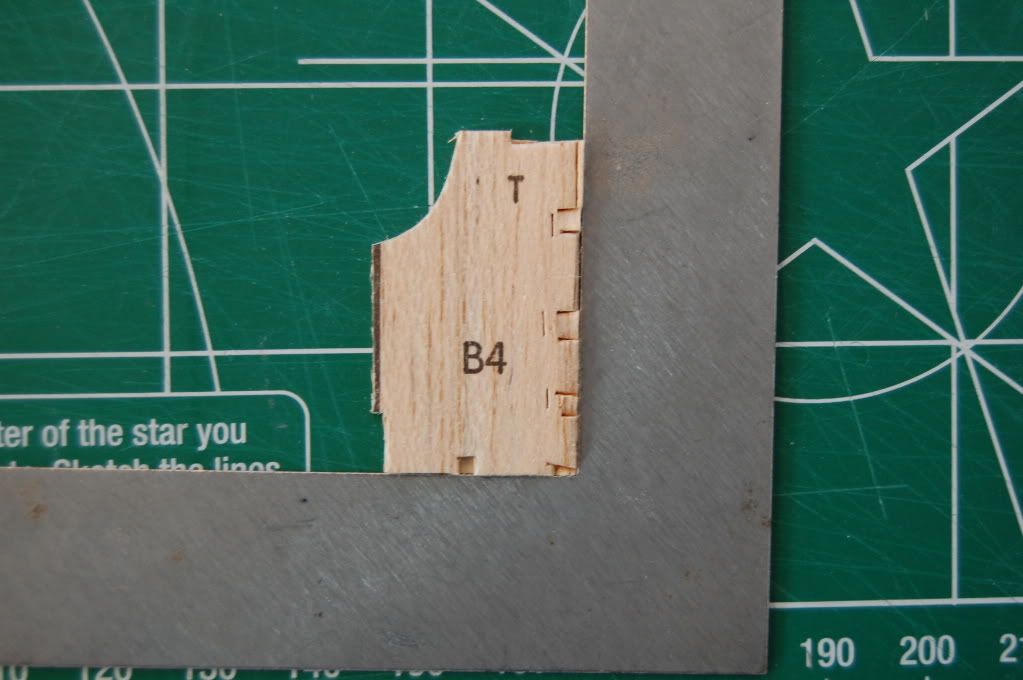
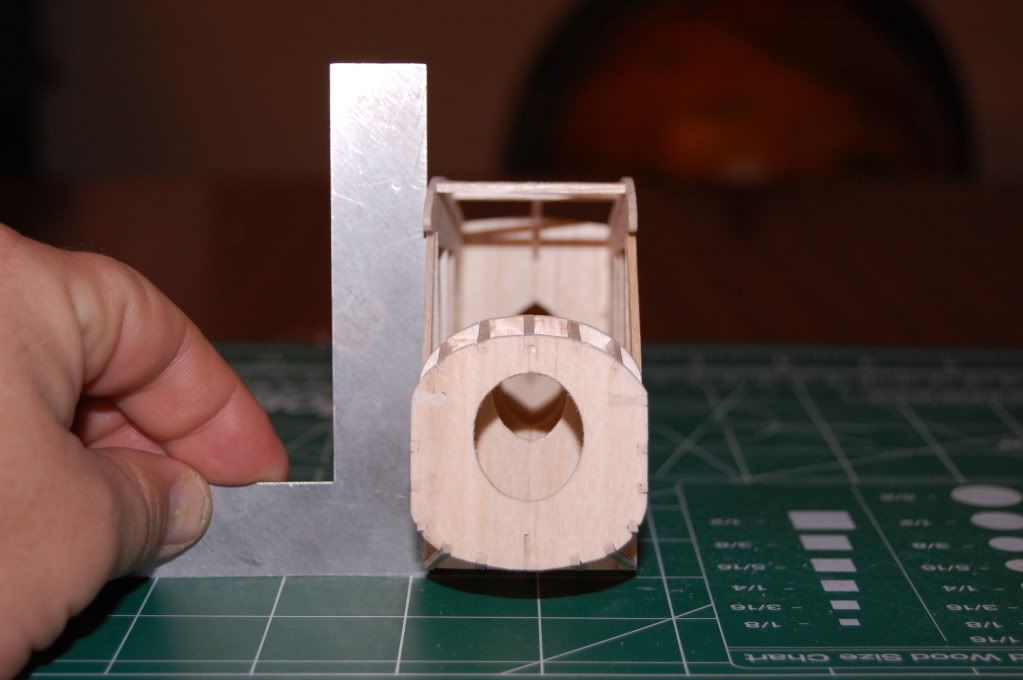
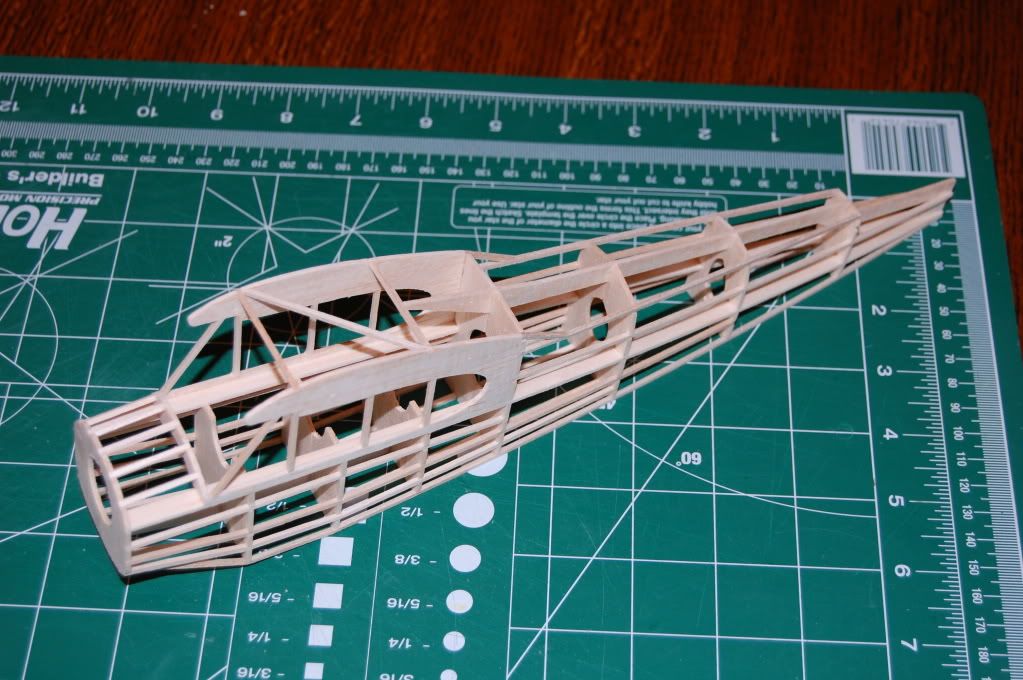
Well a top wing plane could fly without dihedral if the stab was large enough, just look at the Fike. This Cub may or may not fly well without dihedral since the stab is small but I am not going to find out. For this size kit I would not go less than 1 inch, but that is just me. I have no science or rule or thumb, I just know from experience what works best for me. Any way I have been able to break away for a couple of hours to build the fuselage. I think these square boxes are tougher to build than the round WWII birds. To help me keep everything square I use a square to cut out the parts. This also works if you choose to use the Guillows wood. First place a piece of Avery Full Sheet removable label paper to the rear of the Guillows wood. This is to keep the piece from falling apart. Now just use the square and sharp knife to cut out the part. Use the plans as a reference to make sure the part is exact size. Now if there are die cut parts that are not even or the notches are off from the plan. Go ahead and add some diluted glue to the die cut notch so it does not come out. Then when the glue dries you can make a new notch that matches the plan.
Now when I add the stringers I make sure to add to both sides at the same time. This will prevent twisting of the fuselage. I am always watching to see what the keels do. If the keel is not straight I stop what I am doing to figure out what is going on. This ensures a straight fuselage.

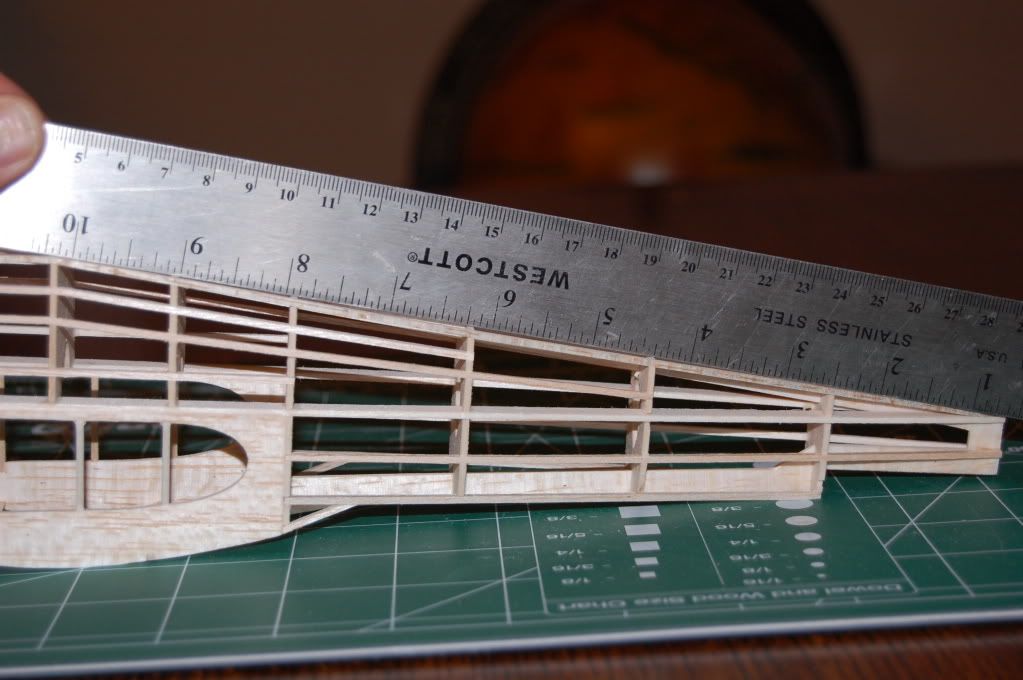
Now when I add the stringers I make sure to add to both sides at the same time. This will prevent twisting of the fuselage. I am always watching to see what the keels do. If the keel is not straight I stop what I am doing to figure out what is going on. This ensures a straight fuselage.
- scigs30
- Posts: 844
- Joined: Mon Nov 06, 2006 11:31 am
![]() by scigs30 » Sat Mar 28, 2009 12:51 am
by scigs30 » Sat Mar 28, 2009 12:51 am
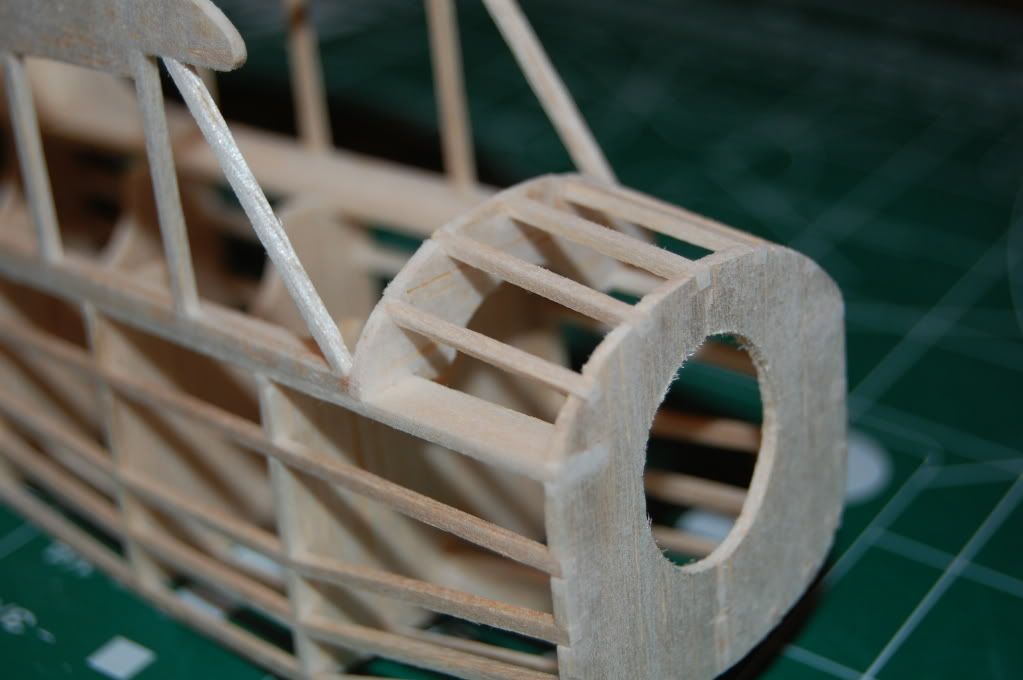
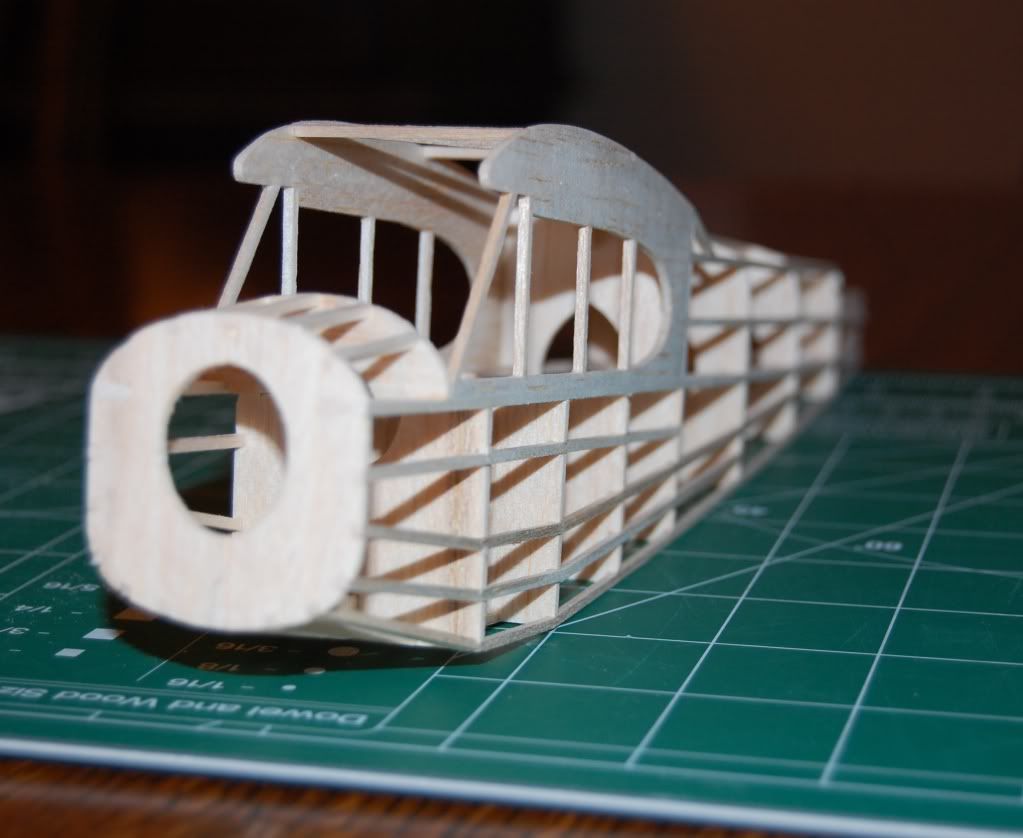
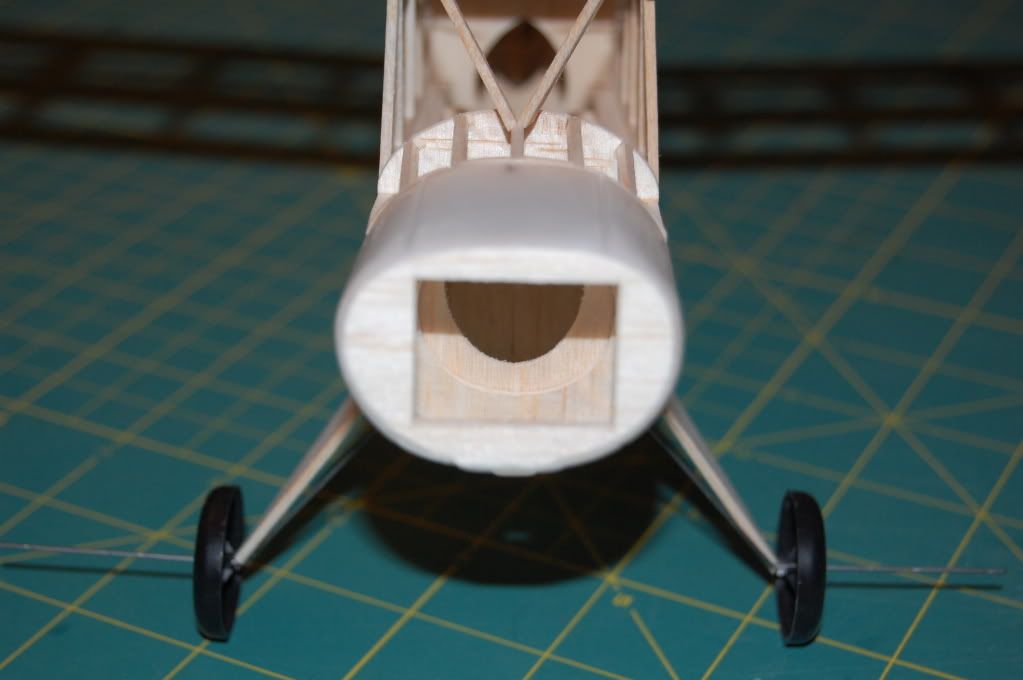
I am making a few changes to the overall structure. First I decided to make former F7 and BB have larger rubber clearances. Second I am not adding the landing fairings to the end. I glued them on the Aronica and they broke on the first landing. Being glued into the fuselage make it tougher to repair. Also I moved the peg up closer to aid in easier installation of the rubber. More pictures to come in the next week as time permits.
- scigs30
- Posts: 844
- Joined: Mon Nov 06, 2006 11:31 am
![]() by thymekiller » Sat Mar 28, 2009 7:53 am
by thymekiller » Sat Mar 28, 2009 7:53 am
Wow !! That really is some awsome wood work. Great pics also.
Thank you for the tip on cutting square parts. I hadnt thought about that until now. What glue do you use? I cant see any of it !!! Nice work.
thymekiller
Thank you for the tip on cutting square parts. I hadnt thought about that until now. What glue do you use? I cant see any of it !!! Nice work.
thymekiller
"...the road goes on forever, and the party never ends..."
- thymekiller
- Posts: 331
- Joined: Fri Sep 12, 2008 7:50 pm
- Location: Springfield, MO.
![]() by scigs30 » Sat Mar 28, 2009 3:01 pm
by scigs30 » Sat Mar 28, 2009 3:01 pm
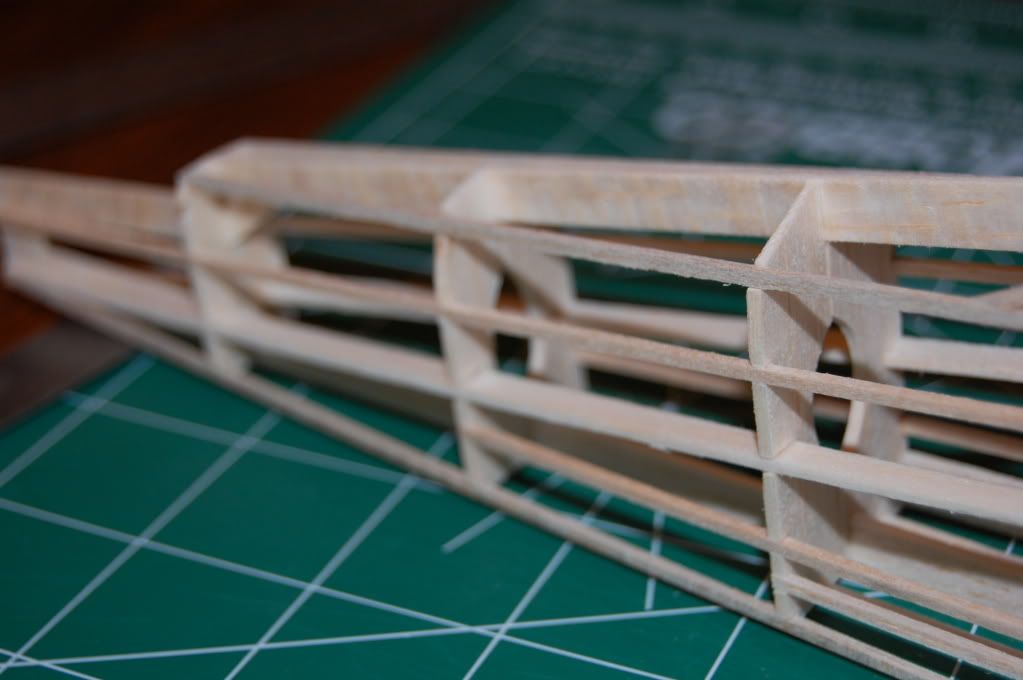
I don't use anything to hold the stringers in place but my hands. It only takes a min or two for the glue to dry. I use a piece of wood to place the glue in the notch, then place the stringer in the notch. I then pull the stringer out real quick, smear the glue on the stringer and apply a little more glue and place the stringer back in. This is the double glue method that is used on wood and makes for a strong joint and rapid dry time. It sounds like a lot of work, but I had all those stringer in place in about 1 hour.
- scigs30
- Posts: 844
- Joined: Mon Nov 06, 2006 11:31 am
![]() by scigs30 » Sat Mar 28, 2009 3:12 pm
by scigs30 » Sat Mar 28, 2009 3:12 pm
Also, it does not take much glue to hold the wood together and make for a strong joint. Another trick is to make the notches exactly 1/16 sq. so that there is a tight fit. If the fit is loose then it will not make for a good joint. Trying to fill the gap will for sure cause twisting of the stringers and fuselage since glue shrinks as it dries. If the notch is too big you can use a balsa wood shim to make for a tighter fit.
- scigs30
- Posts: 844
- Joined: Mon Nov 06, 2006 11:31 am

![]() by scigs30 » Sun Mar 29, 2009 1:41 pm
by scigs30 » Sun Mar 29, 2009 1:41 pm
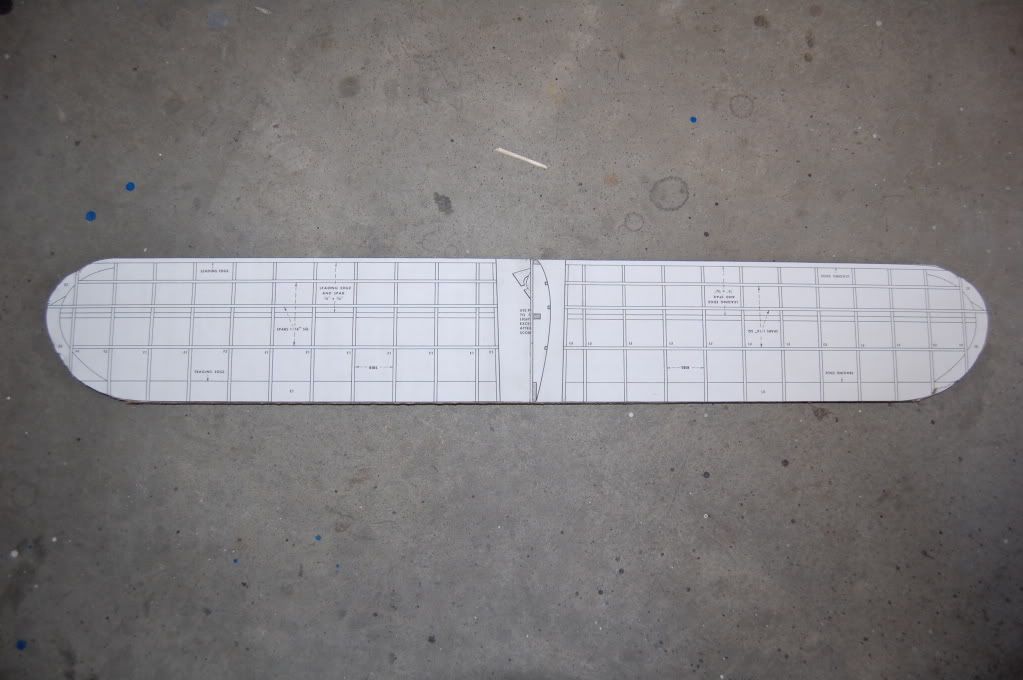
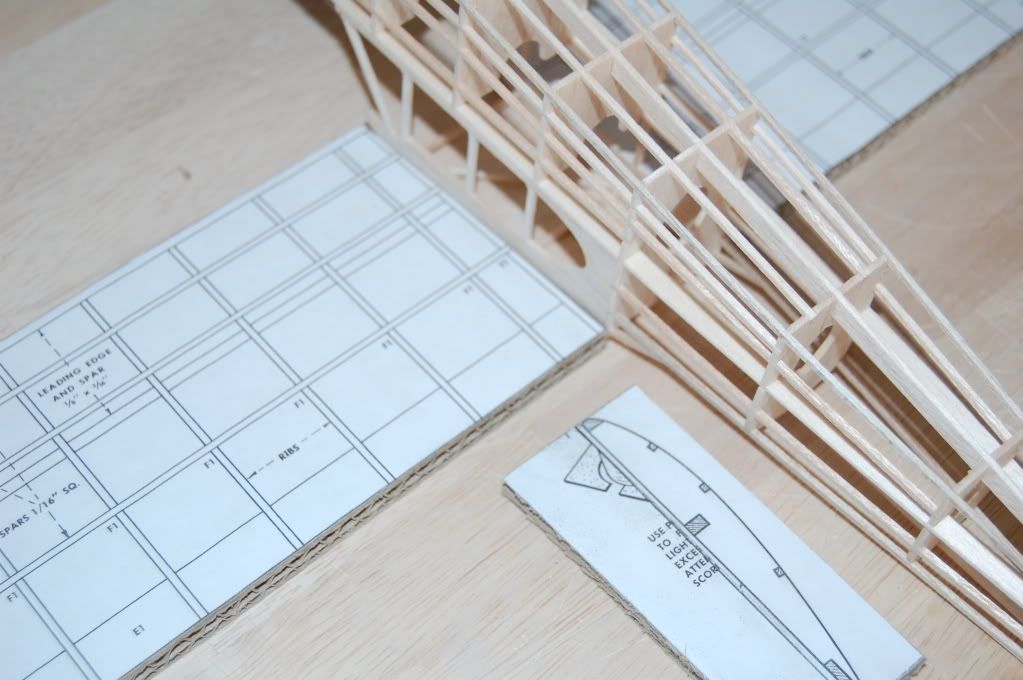
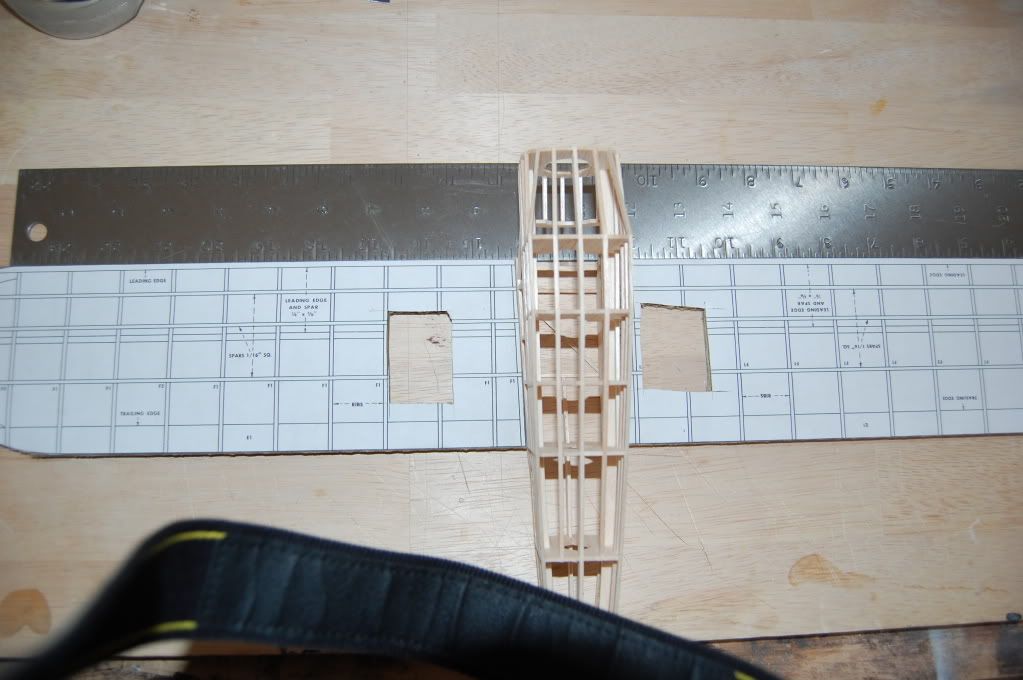
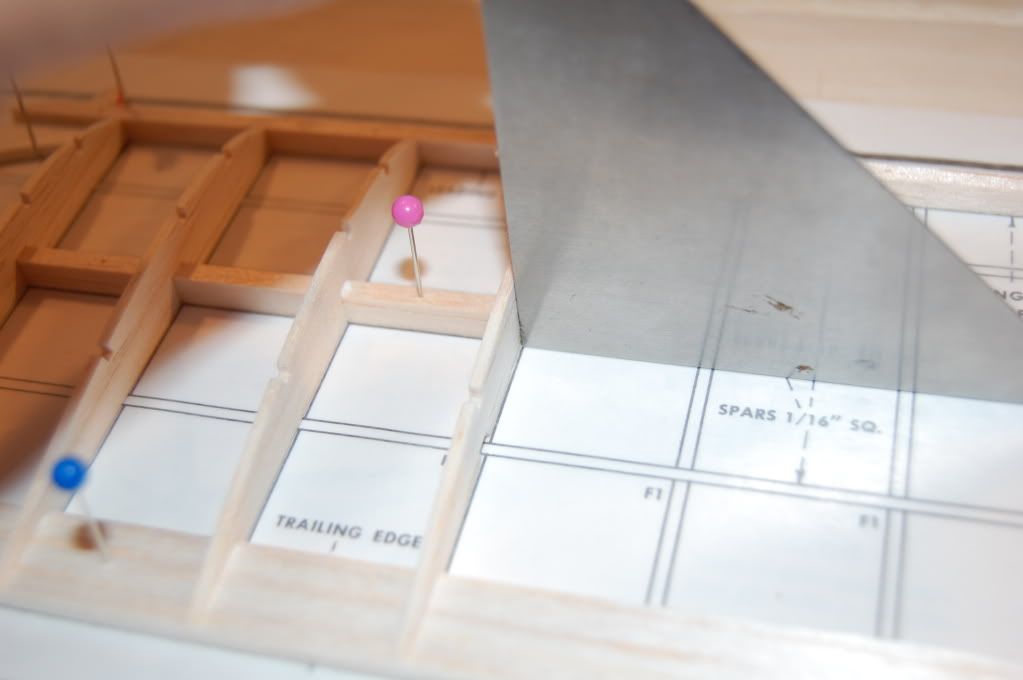
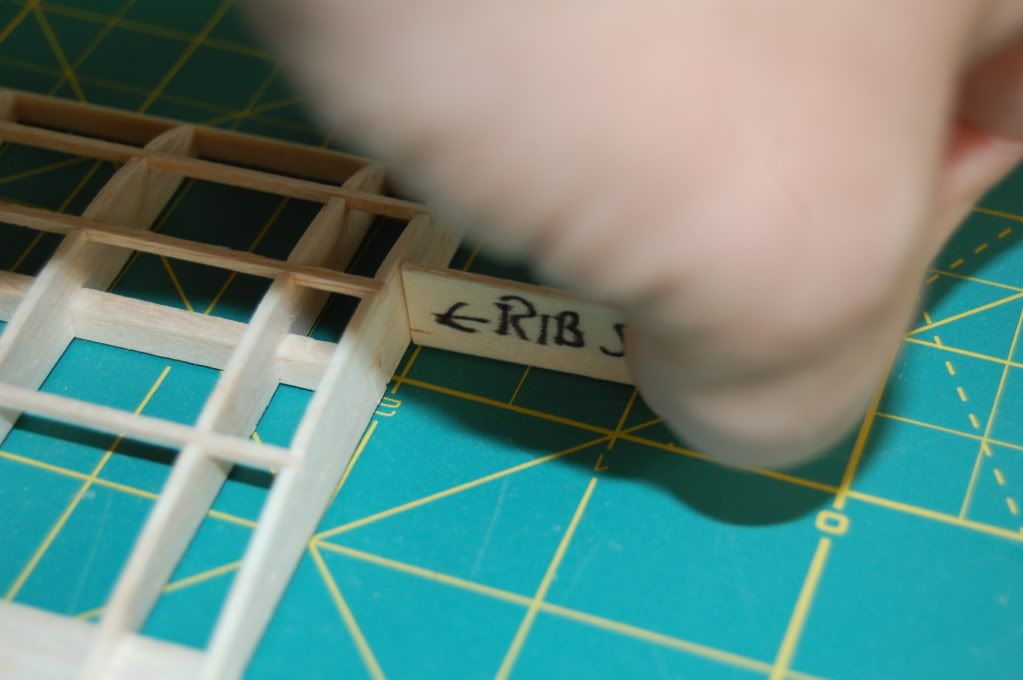
I am now beginning on the wing and the first thing is to make sure my root ribs are in the right place. For the most part if you build the plane nice and square the angle on the plans should work, but for some reason I am usually off by a little. This plane I was off by 1/32 of inch. That may not seem like much but it will produce a crooked wing. So what I did was cut out a 24inch piece of card board and glued copies of the wing panels to the cardboard. I then put the plane on top of the cardboard and check to see if the wing is straight. Most of the time I just eyeball it, but here I show how to measure. I just pick a spot on the wing and measure to the same spot on the rear of the fuselage. It should be the same. Also I will put a straight edge on the front of the wing to make sure the wing is straight and not swept forward or backwards. I make the marks on the cardboard where the new root rib will go and cut the pieces out. I then place both pieces against the fuselage to make sure everything is ok. Once I am happy with this I put the new measurements on the plan and begin building the wing.

- scigs30
- Posts: 844
- Joined: Mon Nov 06, 2006 11:31 am
![]() by scigs30 » Sat Apr 04, 2009 7:52 pm
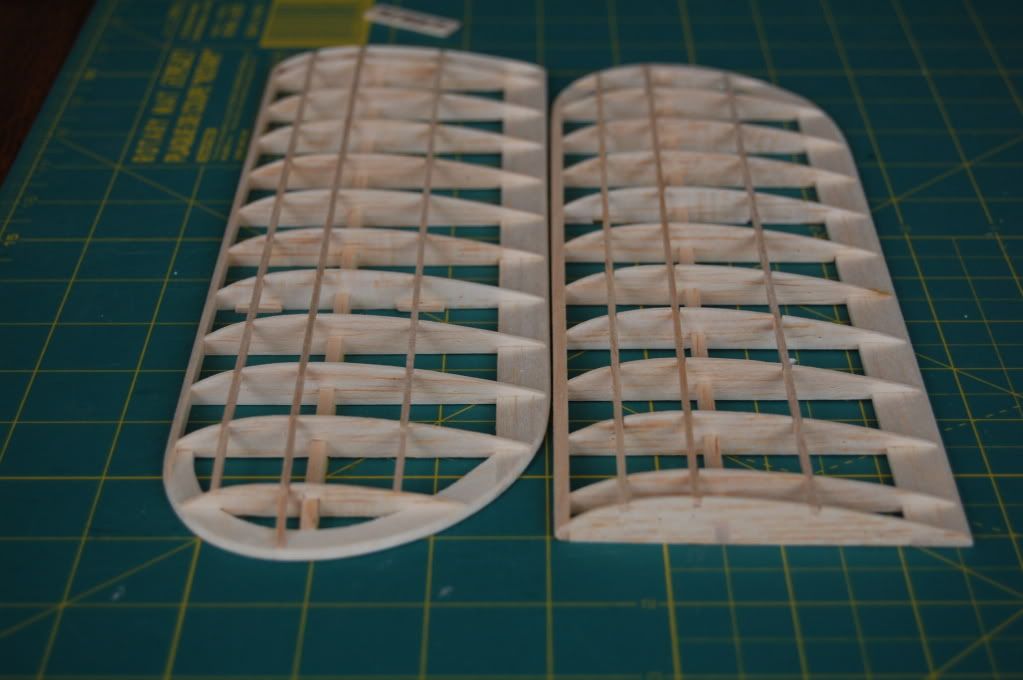
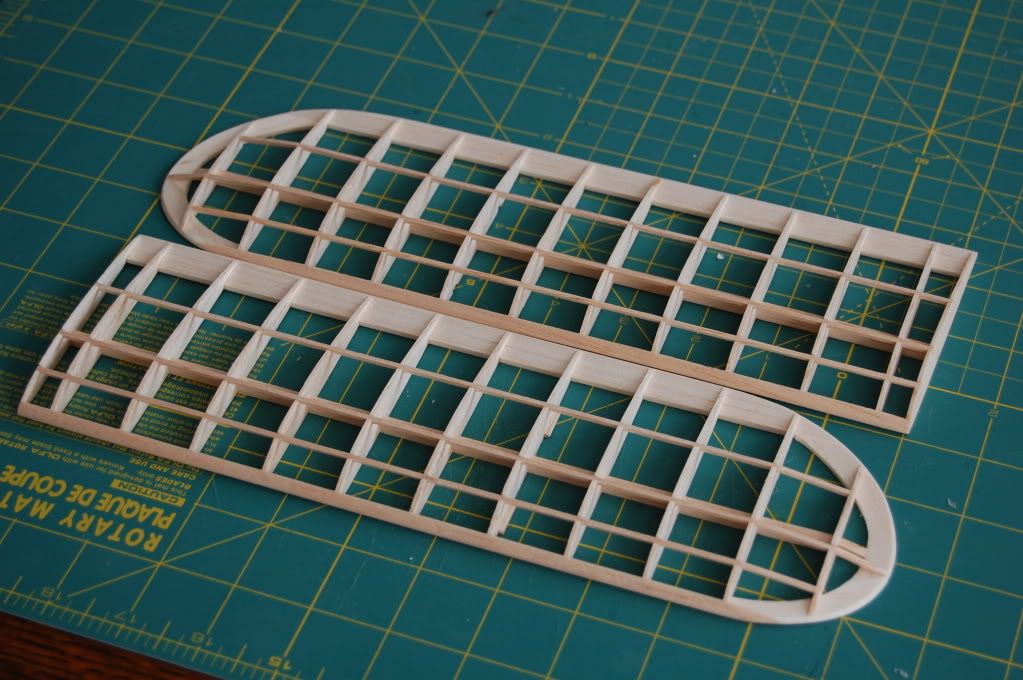
by scigs30 » Sat Apr 04, 2009 7:52 pm
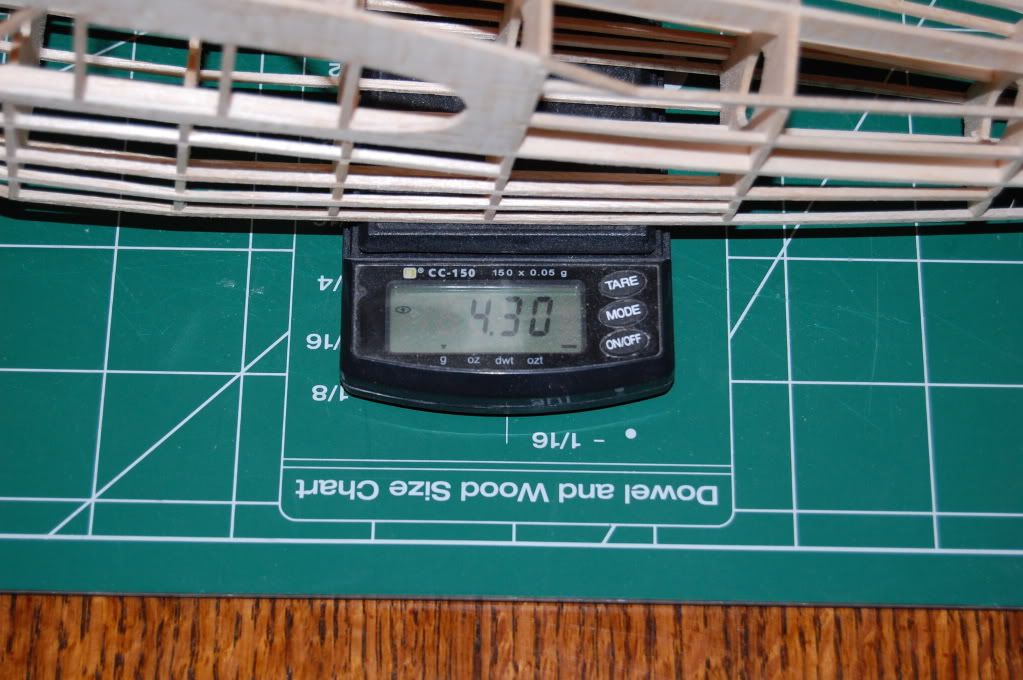
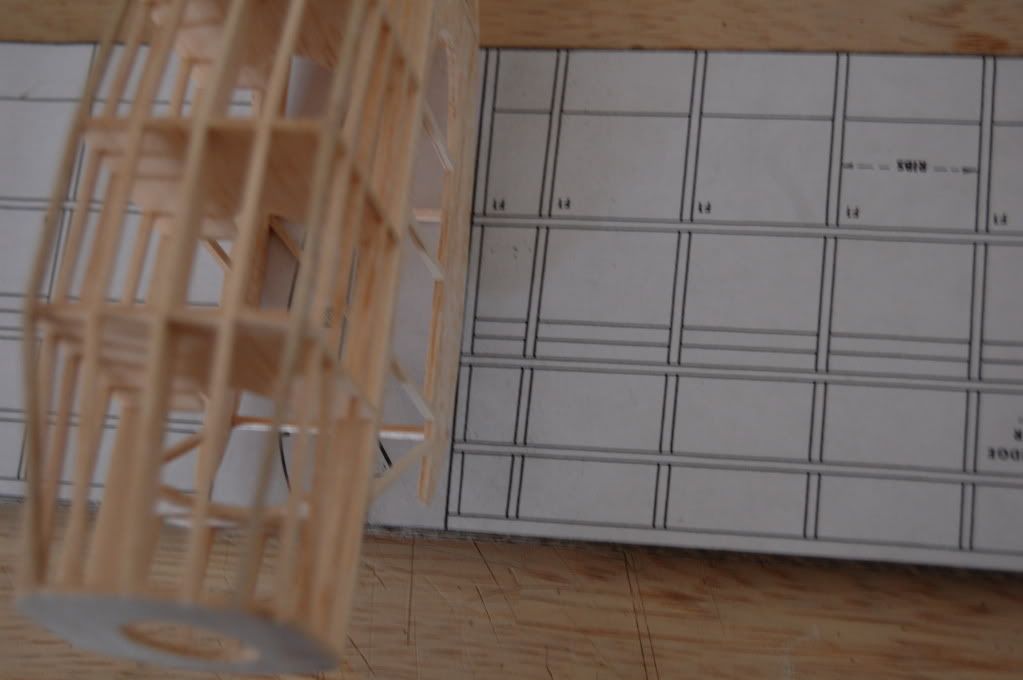
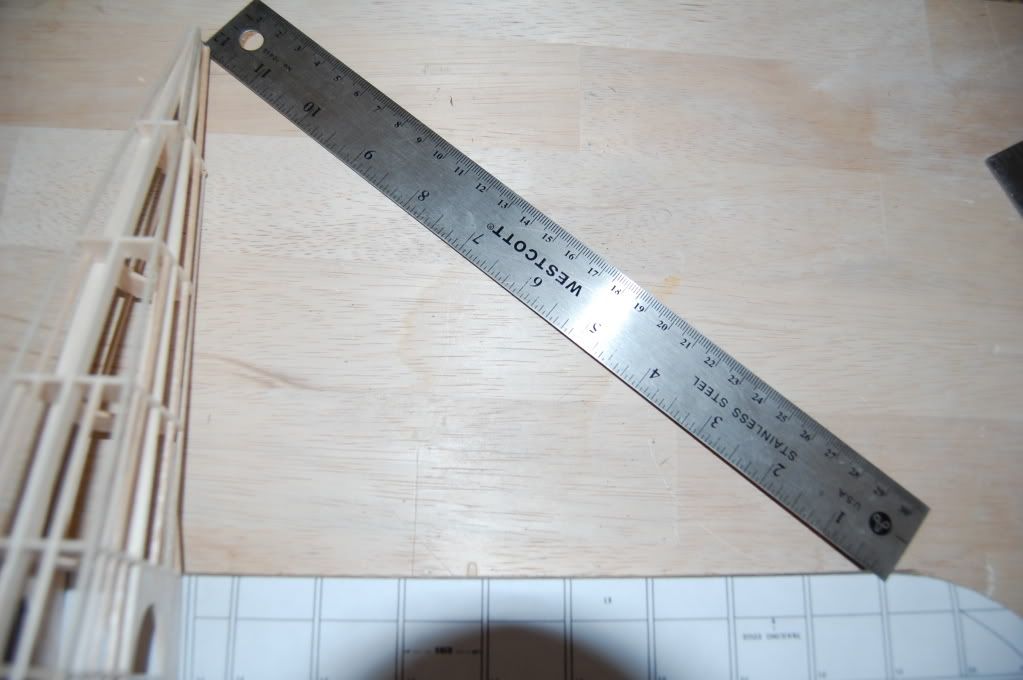
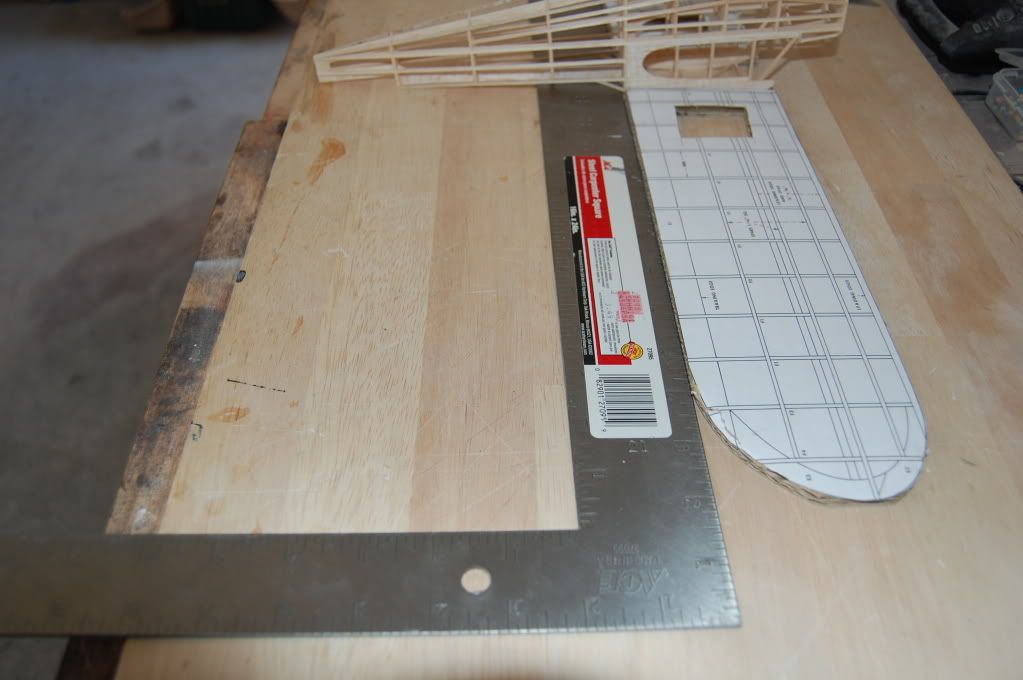
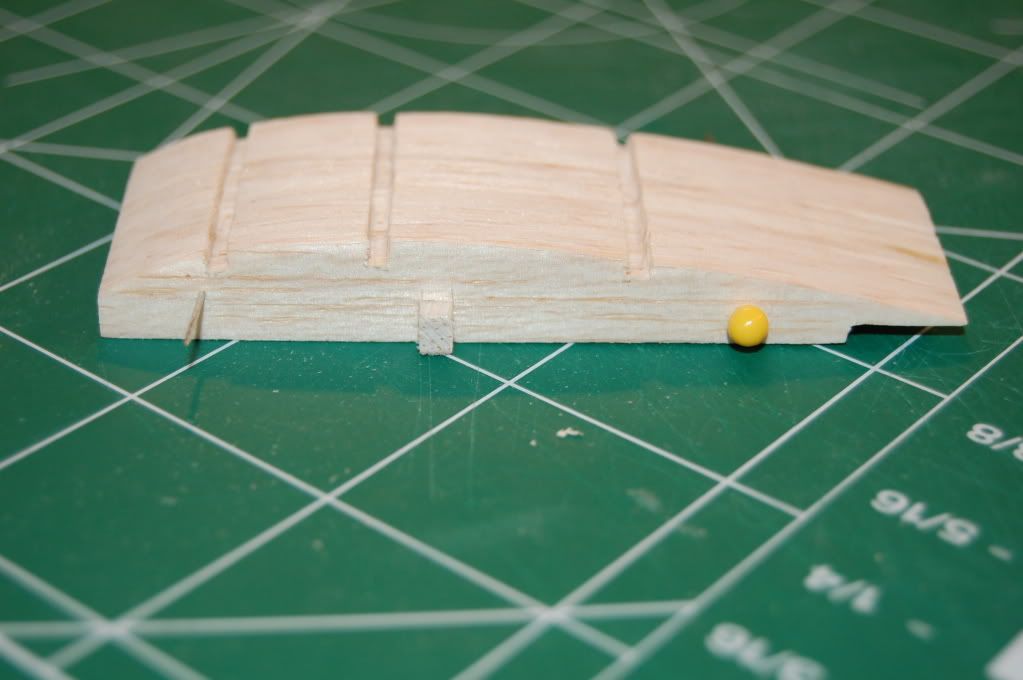
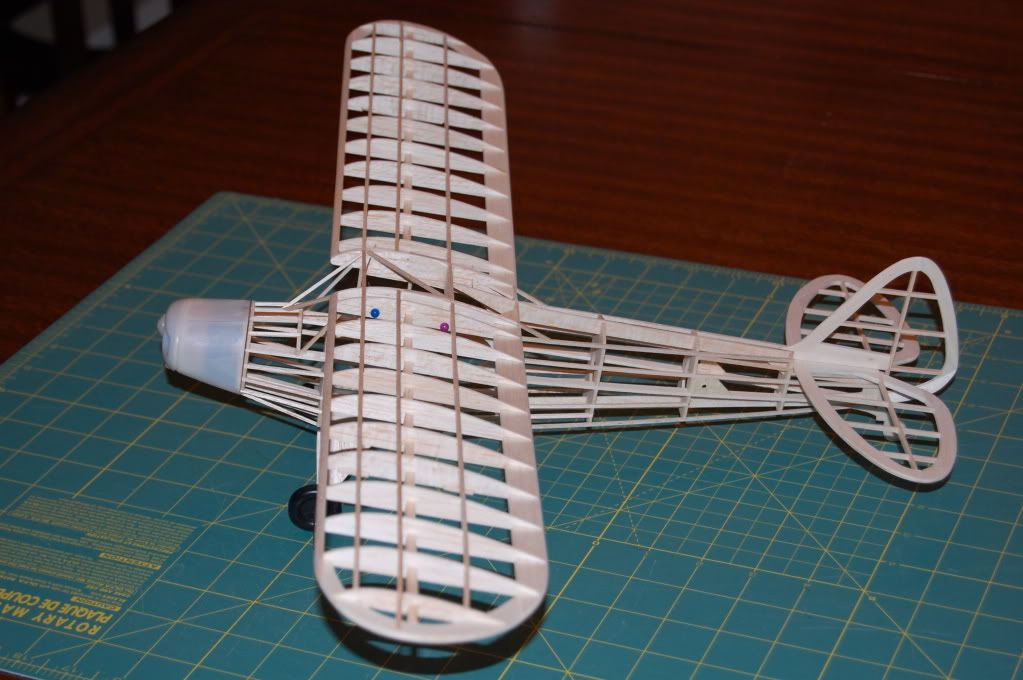
I cut out the ribs, stacked them together and sanded so they are all the same. Wings are done except for fine sanding prior to covering. I used a little balsa jig to add over inch of dihedral under each tip. Even with all the wood to build these wings they are still somewhat light for a 24 inch model. Building is slow since I can only build a couple of hours a week.

- scigs30
- Posts: 844
- Joined: Mon Nov 06, 2006 11:31 am
![]() by scigs30 » Mon Apr 06, 2009 11:20 pm
by scigs30 » Mon Apr 06, 2009 11:20 pm
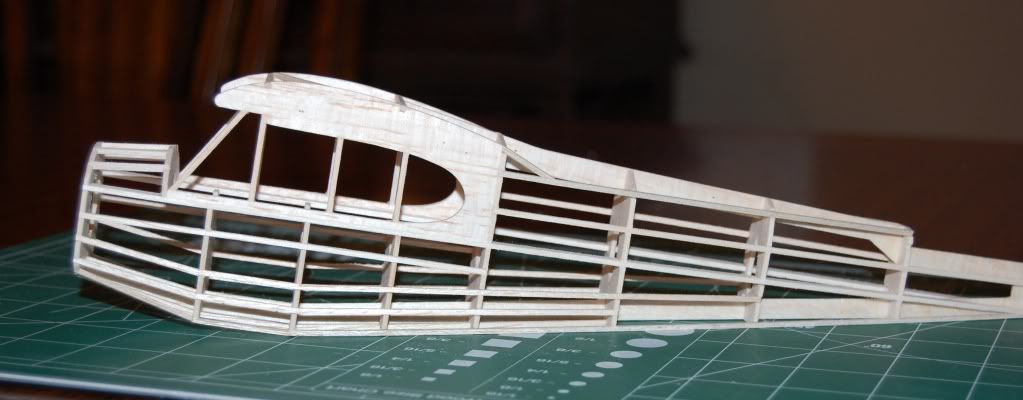
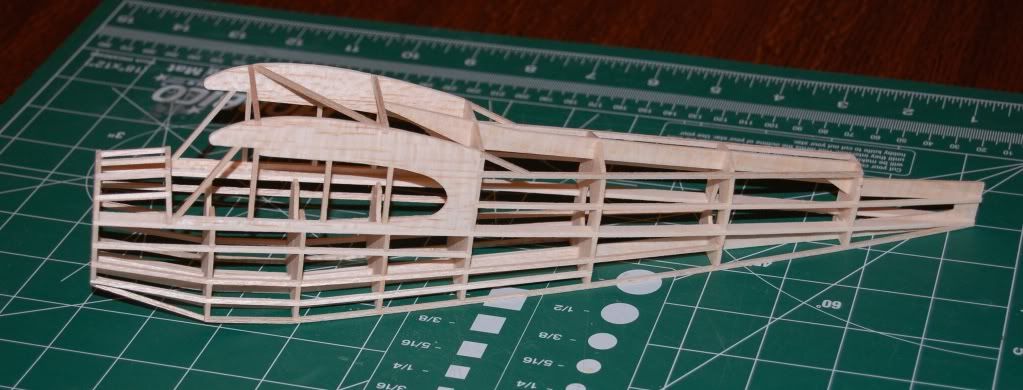
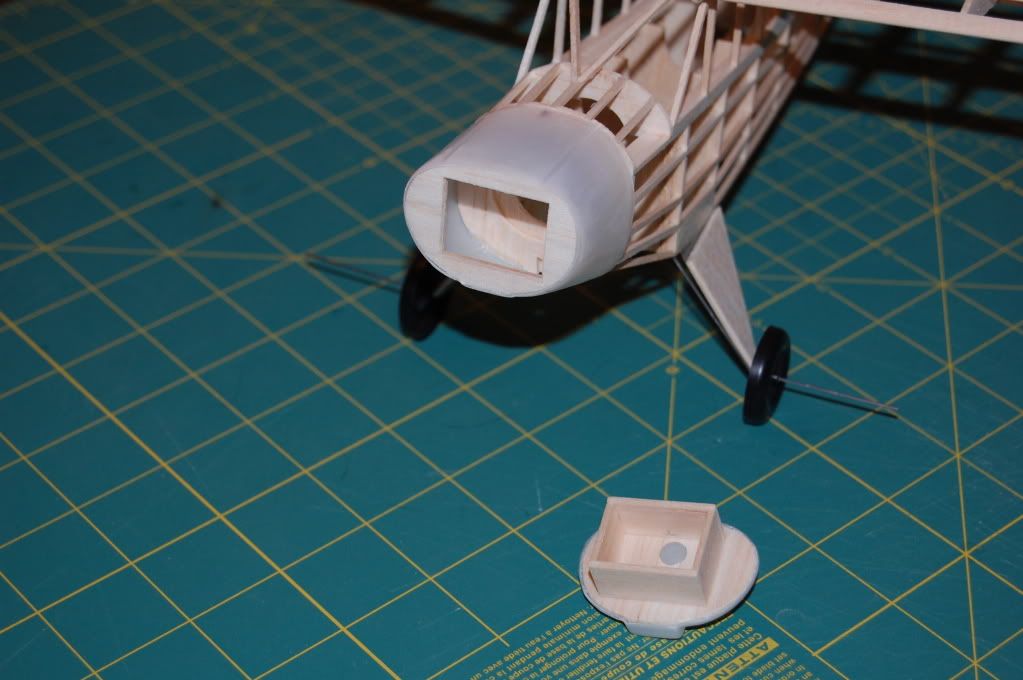
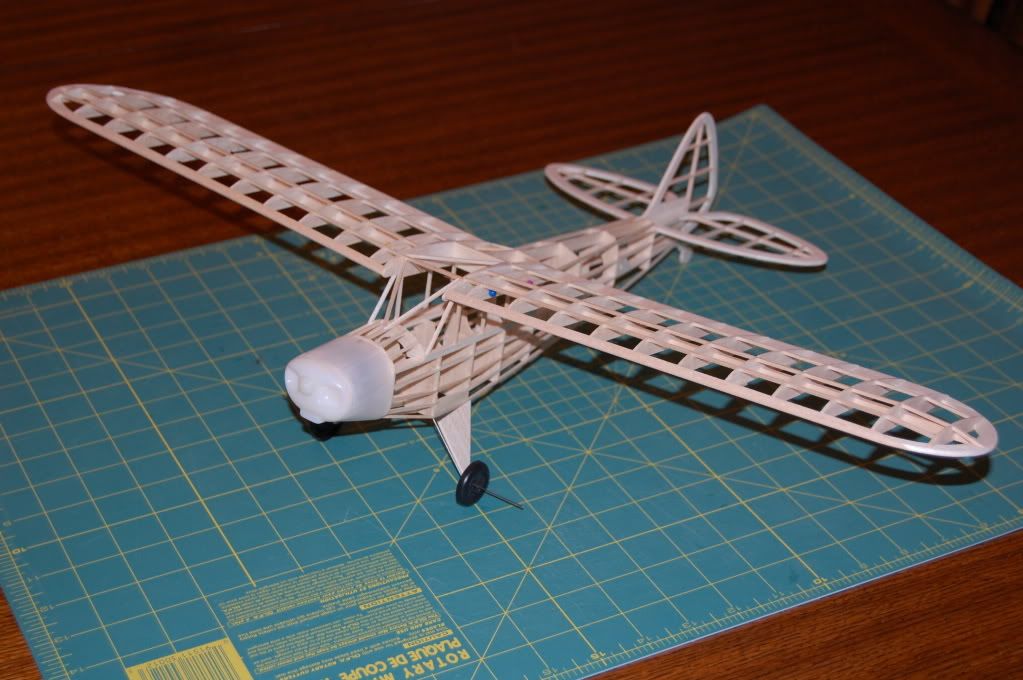
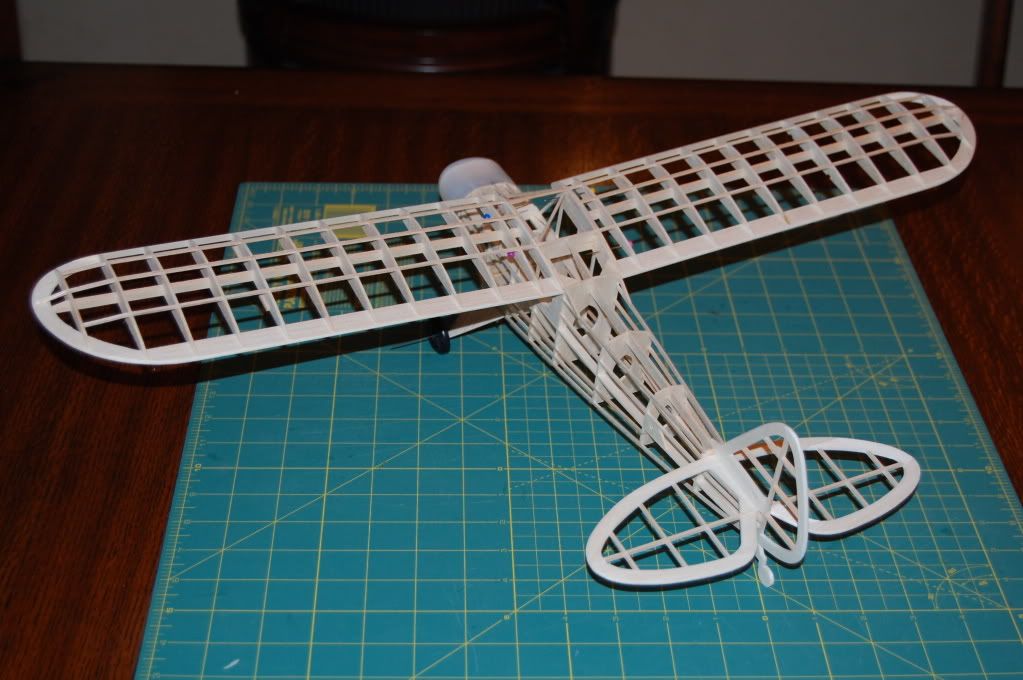
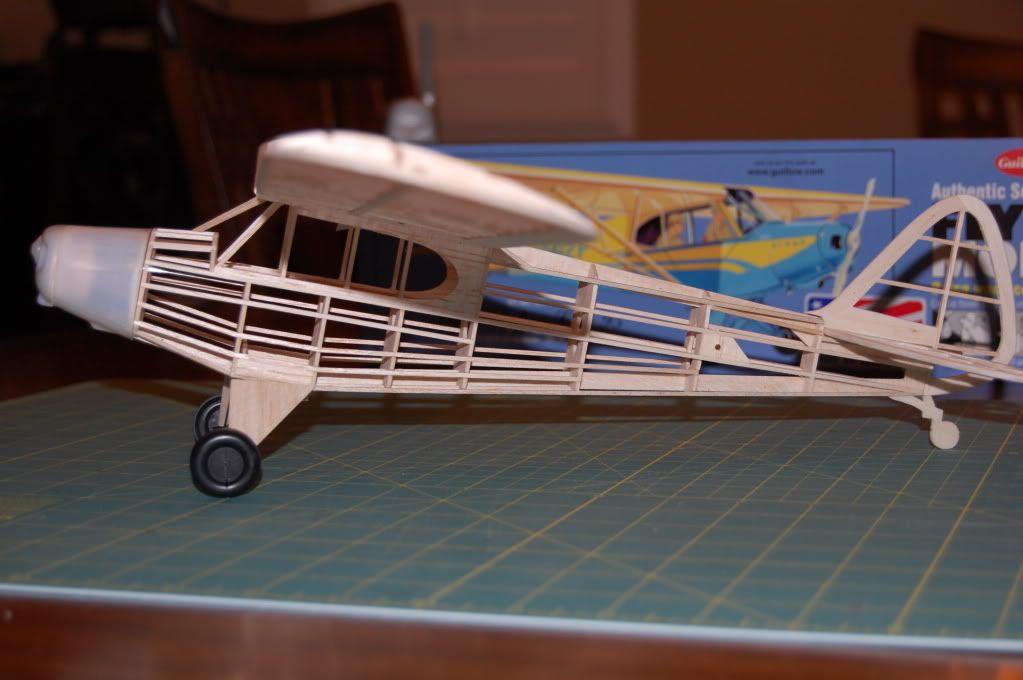
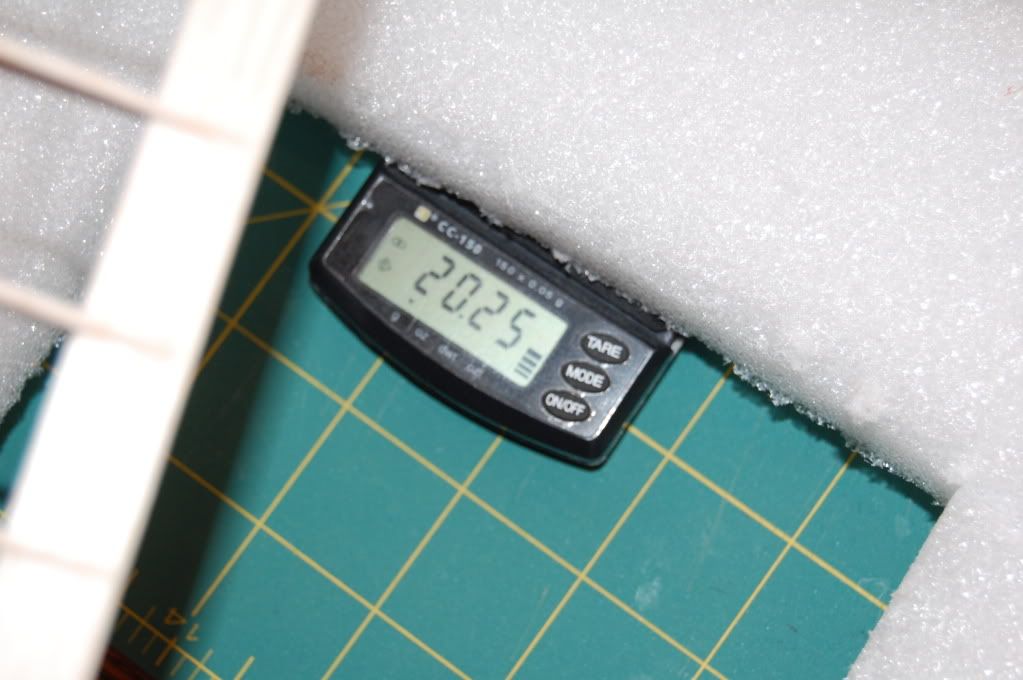
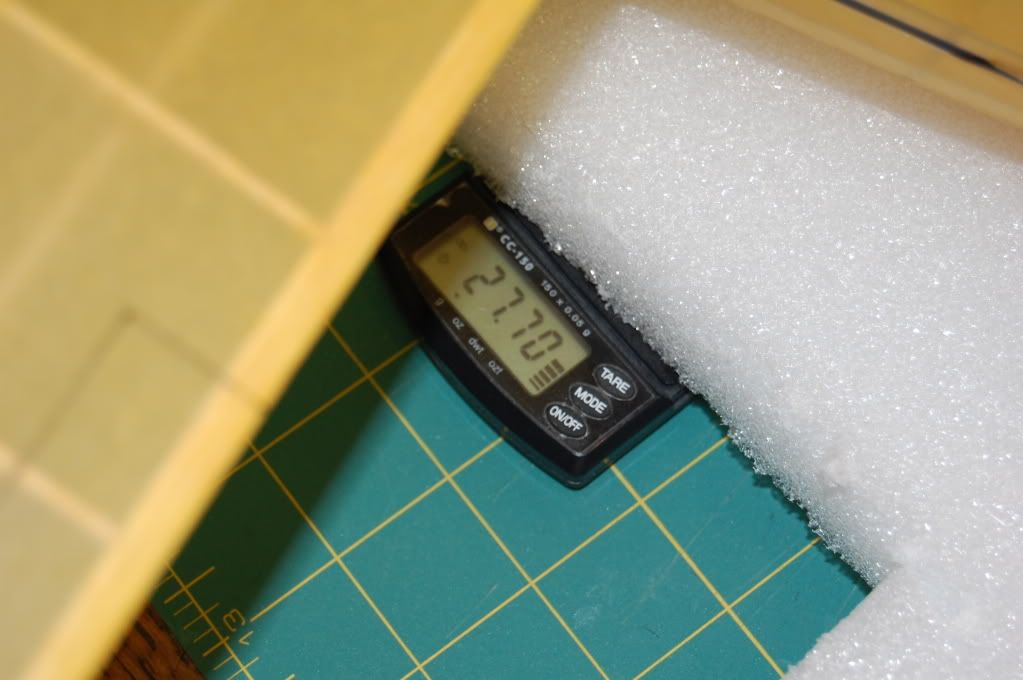
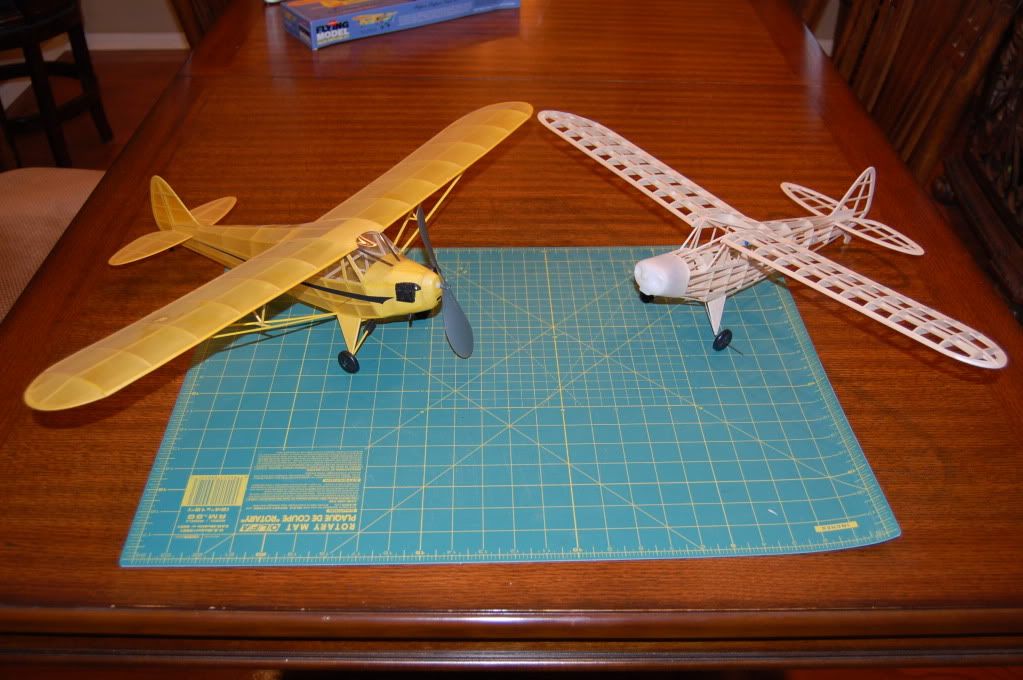
I have most of the Cub done, just have to do some fine sanding here and there. So far this has been a quick build even with me cutting out my own parts. The structures are attached with tape and pins, that is why the cub is not too straight. I will start covering on my next day off. I took pictures of my modified nose block. Also you can see I moved the motor peg up a little to ease with rubber installation. I also modified the landing gear so it won't break on the first landing. I don't know what color she will be, I am only using colored tissue and no paint except for the plastic cowl. Even with the better quality of wood you can see this is still a little heavy. The Yellow Cub next to the Guillows Cub is the Comet Piper Cub 26inch version. I did not do anything special to lighten that kit. The Comet Cub is a great fly-er, you can see she is looking weathered.
- scigs30
- Posts: 844
- Joined: Mon Nov 06, 2006 11:31 am
67 posts
• Page 3 of 5 • 1, 2, 3, 4, 5
Return to General Building Questions
Who is online
Users browsing this forum: Bing [Bot] and 25 guests